iOS: Stepper
It is a particular kind of UIControl that is employed for value increment and decrement. There are two buttons on the stepper. It is linked to a value that, when two of the buttons are depressed simultaneously, is continually increased or decreased. The length of time the user presses the control determines the pace of change.
class UIStepper : UIControl
For the UIStepper, we can set the maximum and lowest values, however the highest value will always be higher than the minimum. Both of these values become equal if the maximum value is less than the minimum value.
Steps to add Stepper to storyboard
1.To modify the text of a label, text field, or button when the stepper value is changed, set it up.
2.Navigate to the object library, find the UIStepper, and drag the result onto the storyboard.
3.In the ViewController.swift file, create the stepper’s outlet and action outlet.
4.In the ViewController.swift file, programmatically configure the stepper.
5.To control the stepper’s size and placement on various screen sizes, set the UIStepper’s auto-layout rules.
Example
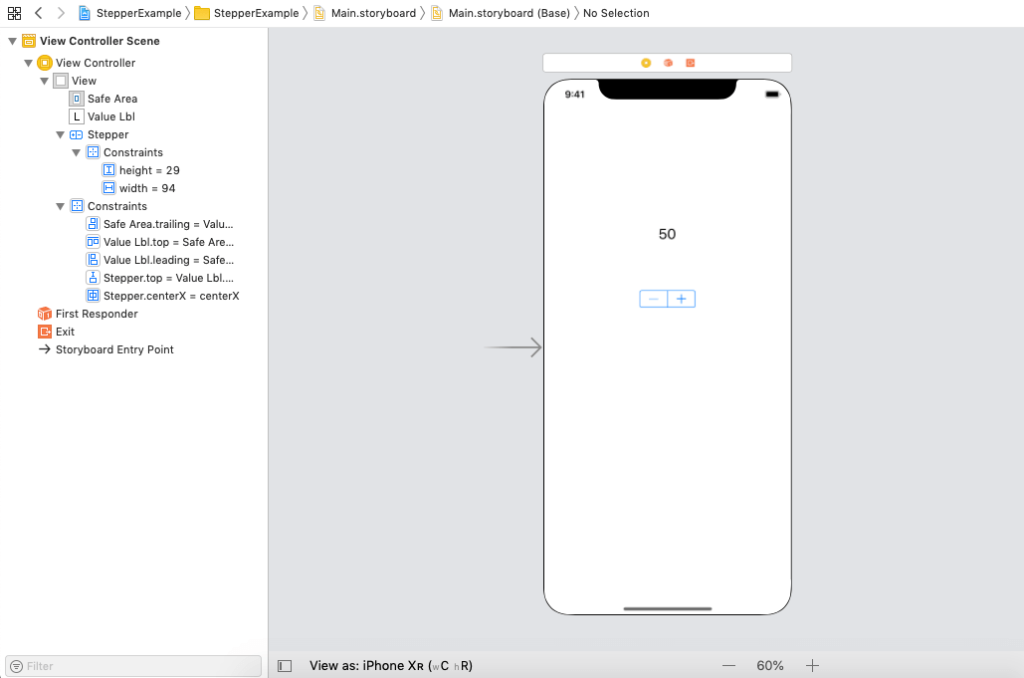
In this example, the UIStepper and a label are being used. In this straightforward example, the label’s text is altered to reflect the stepper value’s change.
Interface Builder
The interface builder displayed in the next image was made using the label and the UIStepper.

ViewController.swift
					import UIKit

class ViewController: UIViewController {

    @IBOutlet weak var valueLbl: UILabel!
    @IBOutlet weak var stepper: UIStepper!

    override func viewDidLoad() {
        super.viewDidLoad()
        // Do any additional setup after loading the view.
        stepper.autorepeat = true
        stepper.isContinuous = true
        valueLbl.text = stepper.value.description
        stepper.maximumValue = 20
        stepper.minimumValue = -20
    }

    @IBAction func stepperValueChanged(_ sender: UIStepper) {
        valueLbl.text = sender.value.description
    }
}
Output

