iOS: Date Picker
A control called DatePicker is used in iOS applications to obtain the user’s input for the date and time. Either the time in point or the time interval can be entered by the user.
class UIDatePicker : UIControl
Example
In this example, a text field will be created and any date can be entered by the user by choosing it using the date picker.
We will look for the datepicker in the object library and drag the result into the storyboard in order to add it.
Interface Builder
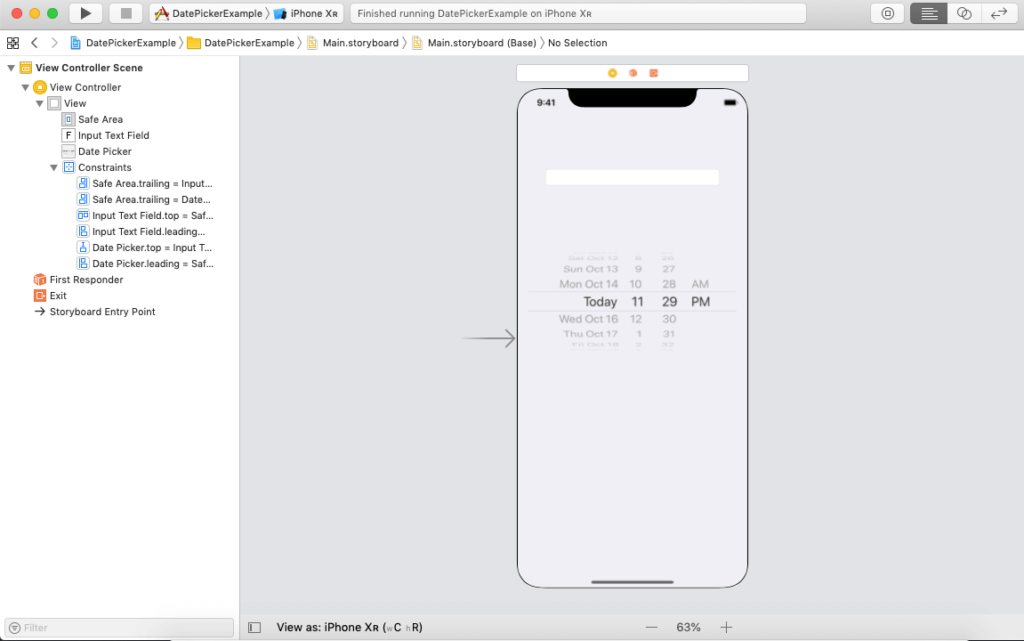
The interface builder that we constructed in the example is seen in the image below. The text field and datepicker outlets in the ViewController.swift file have been generated.

ViewController.swift
We have simply attached the datepicker to the inputView property of the input text field in ViewController.swift. The datepicker’s action connection is triggered each time the datepicker’s value is updated, setting the text field text to the datepicker date. The datepicker mode is now set to date in this example; to obtain the proper datetime or time values, we can change it to dateAndTime or time.
					import UIKit

class ViewController: UIViewController {

    @IBOutlet weak var inputTextField: UITextField!

    @IBOutlet weak var datePicker: UIDatePicker!

    let dateFormatter = DateFormatter()

    override func viewDidLoad() {
        super.viewDidLoad()
        // Do any additional setup after loading the view.
        dateFormatter.dateFormat = "MM/dd/yyyy"
        inputTextField.inputView = datePicker
        datePicker.datePickerMode = .date
        inputTextField.text = dateFormatter.string(from: datePicker.date)

    }

    @IBAction func datePickerValueChanged(_ sender: UIDatePicker) {

        inputTextField.text = dateFormatter.string(from: sender.date)
        view.endEditing(true)
    }
}
Output

Core attributes
| SN | Attribute | Description |
|---|---|---|
| 1 | Mode | It represents the DatePicker Mode. It is used to determine whether the datepicker is going to display the date, time, date and time, or a countdown interval. This can be accessed at runtime using datePickerMode property. |
| 2 | Locale | This represents the locale associated with the datepicker. This property overrides the system default locale. This can be accessed at runtime using the local property. |
| 3 | interval | It represents the granularity of the minute’s spinner. The default value is 1, and the maximum value is 30. This value must be a divisor of 60. It can be accessed at runtime using minuteInterval property. |
Date Attributes
| SN | Attribute | Description |
|---|---|---|
| 1 | Date | It represents the date that the date picker is going to display initially. We can set this property at runtime. |
| 2 | Constraints | It represents the range of the dates that can be selected. We can configure the minimumDate and maximumDate property to configure the range. |
| 3 | Timer | It is the initial value of the datepicker when it is shown in countdown timer mode. |
