iOS: Image View
Without imageview, designing and developing iOS applications is nearly impossible. An object that may show images on the user interface of iOS applications is called ImageView. It is an instance of the UIImageView class, a UIView descendant class.
class UIImageView : UIView
Adding ImageView to the interface
Adding images to the project in Xcode
It’s easy to add images to a project in Xcode by just dragging an image file from your local device storage folder into the project’s assets folder.
Open Xcode and navigate to the Assets.xcassets folder, as illustrated in the picture below. All of the project’s assets, including the app icon, are contained in this folder.
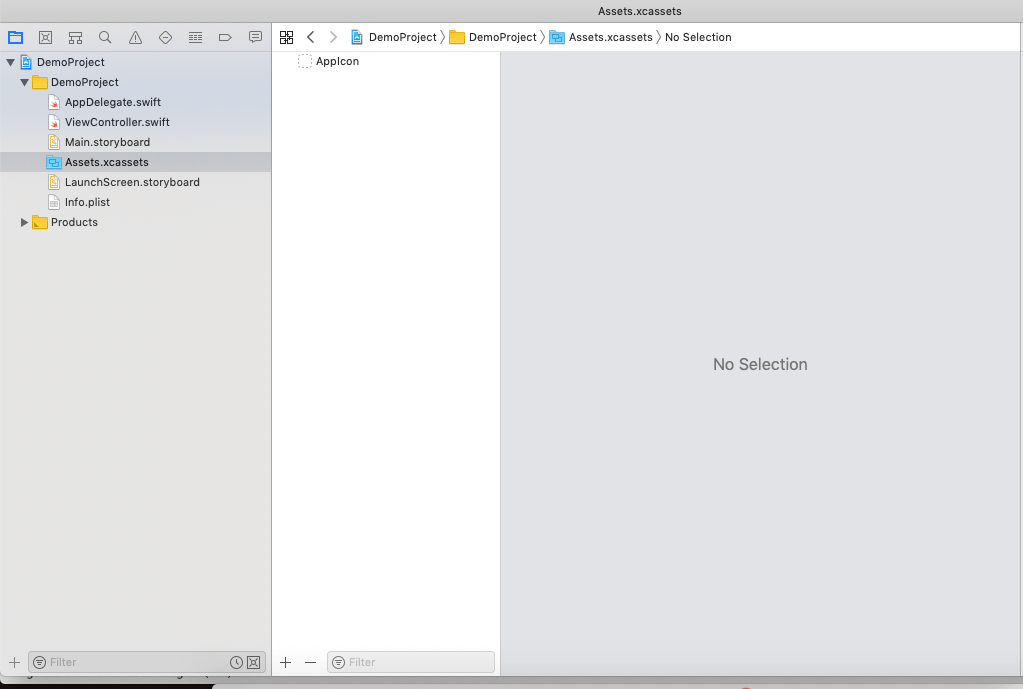
At first, the Xcode contains no assets. Right-click in the left pane beneath the AppIcon, select New ImageSet from the list, and you’ll add a new imageset to the assets.
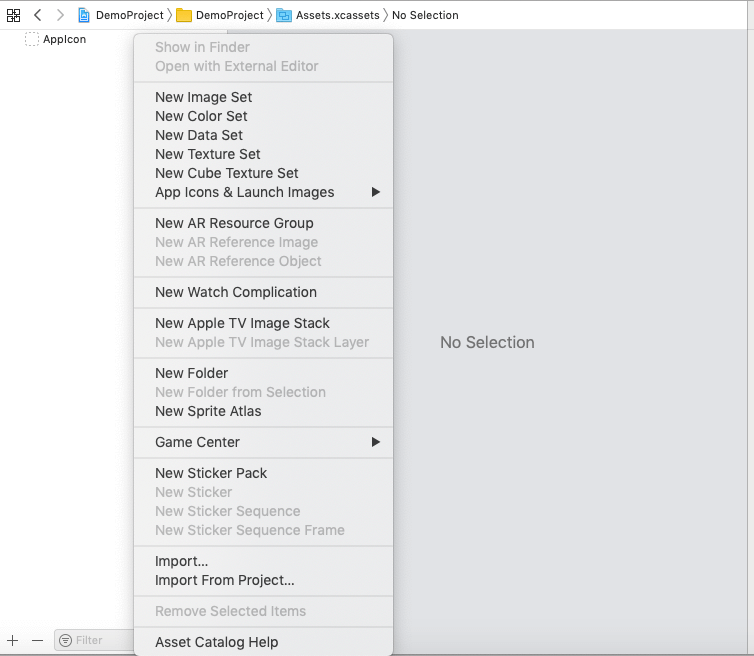
The New Image Set (folder in the assets) will be created as a result. The picture files from the local device must now be dropped into the newly created image collection in Xcode.
The image below displays an image set from which we can select any desired image from our local device.

Three categories of images—1X, 2X, and 3X—can be uploaded to an iOS application project based on their dimensions. Additionally, Universal is noted beneath the image in the above photograph. This indicates that the image is compatible with all devices, such as the iPad and iPhone. Nonetheless, as the image below illustrates, we are able to designate the targeted device category in the window’s right pane.
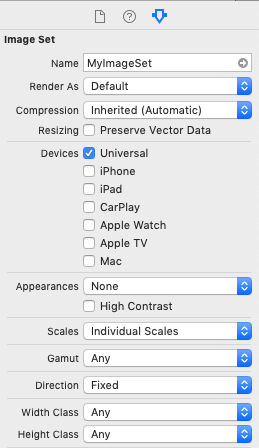
Interface Builder Attributes
| SN | Attribute | Description |
|---|---|---|
| 1 | Image | It represents an UIImage object to display. We can set the image from the storyboard or programmatically by using the image or animatedImages property of UIImageView class. |
| 2 | Highlighted | It represents an UIImage object which is displayed when the imageview is highlighted. To set this attribute programmatically, we can use highlightedImage or highlightedAnimationImages property. |
| 3 | State | This attribute is used to change the initial state of imageview to highlighted. Use the isHighlighted property to check whether the imageview is in highlighted state. |
Scaling images in ImageView
The image view’s contentMode attribute determines how the image should be displayed. We must adjust how an image appears on the interface if the size of the photos to be displayed using imageview is larger than the imageview itself. While using photographs of the same size is generally advised, imageview allows you to resize the images to fill all or part of the available area. The original aspect ratio of the image is preserved when using the UIView.ContentMode.scaleAspectFit and UIView.ContentMode.scaleAspectFill modes to scale it to fit or fill the available space. The image may appear distorted because the UIView.ContentMode.scaleToFill value scales it without taking into account the original aspect ratio. Other content modes do not scale the image; instead, they position it within the confines of the image view at the proper spot.
Image Transparency
Example
In this example, we will create an imageview and use its image attribute to programmatically set a UIImage object to the imageview. We’ll create a new image to the Xcode project just for this reason.
Interface Builder
Use the object library to search for imageview, then drag the result to the storyboard to create an image view.

Establish the auto-layout guidelines for the image view to control its dimensions and placement across various screen widths. But as you can see in the image below, we’ll also add an image from the local device to the assets in Xcode.
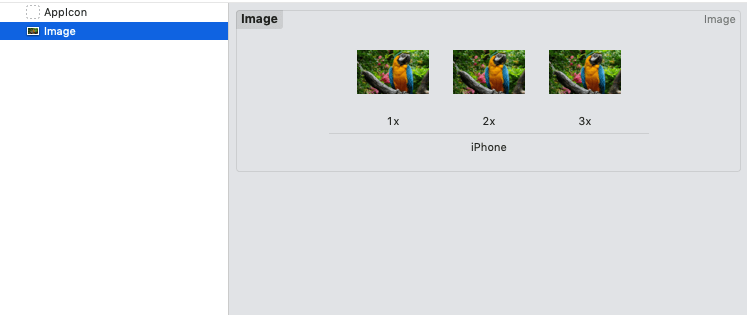
The following image displays the main.storyboard.

ViewController.swift
					import UIKit


class ViewController: UIViewController {


    @IBOutlet weak var myImageView: UIImageView!
    var img:UIImage = UIImage(named: "Image") ?? UIImage()
    override func viewDidLoad() {
        super.viewDidLoad()
        // Do any additional setup after loading the view.
        myImageView.image = img
        //myImageView.contentMode = .scaleToFill

    }
}
Output
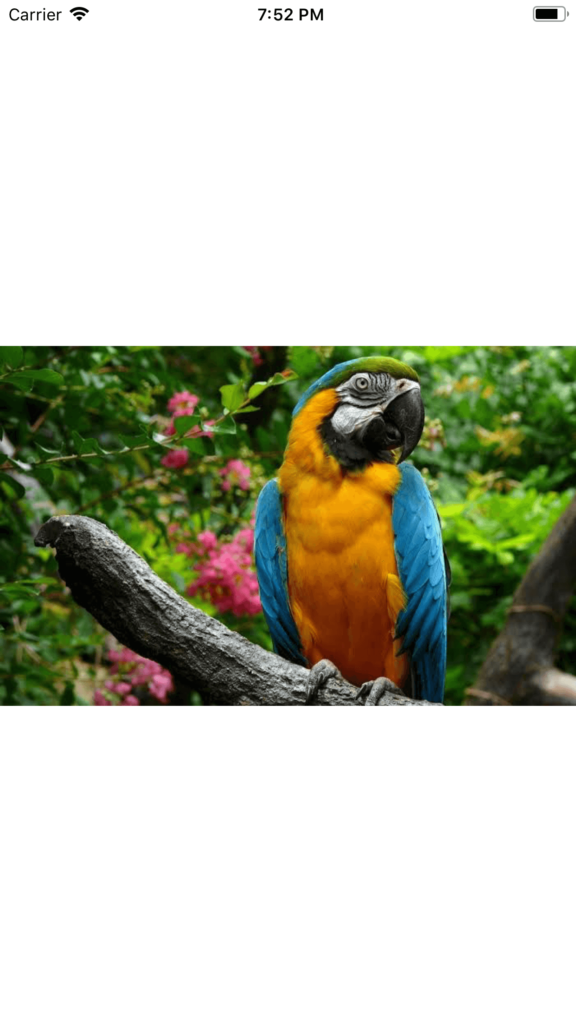
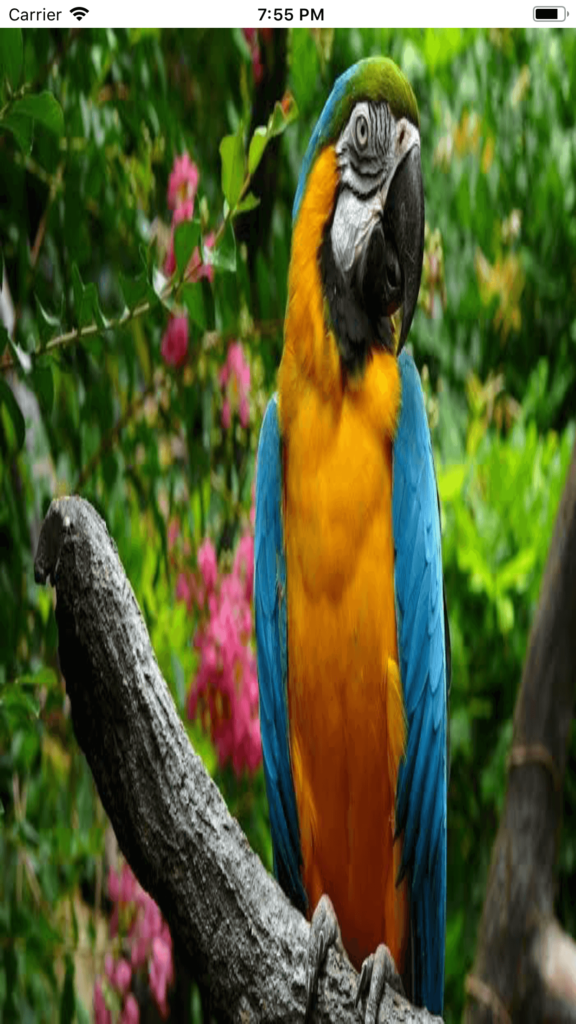
By default, the imageview’s content mode is scaleToFit. On the other hand, the accompanying graphic displays the output of the aforementioned program when we set it to scaleToFill.
Adding touch events to the imageview
The imageview does not react to events by default. Nonetheless, we may enable user interaction for the imageview by setting its isUserInteractionEnabled property to true. With UITapGestureRecognizer, we can set up the tap gestures for the imageview.
Taking a look at the next picture, we will set up the touch gesture for the imageview that is displayed in example
Example
To the storyboard we made in example 1, we will add a second view controller in this example. As seen in the accompanying figure, we will define a segue using the identifying string “segue” between the View Controllers.
Main.storyboard
We will set the isUserInteractionEnabled property and define the tap gesture recognizer for the image view.

ViewController.swift
					import UIKit

class ViewController: UIViewController {

    @IBOutlet weak var myImageView: UIImageView!
    var img:UIImage = UIImage(named: "Image") ?? UIImage()
    override func viewDidLoad() {
        super.viewDidLoad()
        // Do any additional setup after loading the view.
        myImageView.image = img
        myImageView.isUserInteractionEnabled = true
        let tapGesture = UITapGestureRecognizer(target: self, action: Selector("tappedImageView"))
        myImageView.addGestureRecognizer(tapGesture)
    }

    @objc func tappedImageView (){
        performSegue(withIdentifier: "segue", sender: self)
    }
}
Output
