iOS: Scroll View
ScrollView
Sometimes, we may need to display content in iOS applications that doesn’t fit on the screen. In the program, we use ScrollView to display this kind of content. The user can drag the content area in a ScrollView. It is an example of the UIView-derived UIScrollView class.
class UIScrollView : UIView
The contained views of the ScrollView can be zoomed in and out. As UIScrollView’s subclasses, tableview and collectionview offer an excellent method for displaying content that is larger than the screen. When displaying content that can be scrolled vertically or horizontally in iOS applications, tableview and collectionview are used, respectively.
Over the content view, the UIScrollView object’s origin can be changed. A ScrollView monitors finger movements and modifies its origin as necessary.
Adding ScrollView to the interface
Compared to the other objects, adding ScrollView to the interface builder is a little more complicated. To control how the scroll view is arranged and positioned on various screen sizes, we must define the auto-layout rules.
The interface builder (main.storyboard) can be used to add the scrollview to the interface by following these instructions.
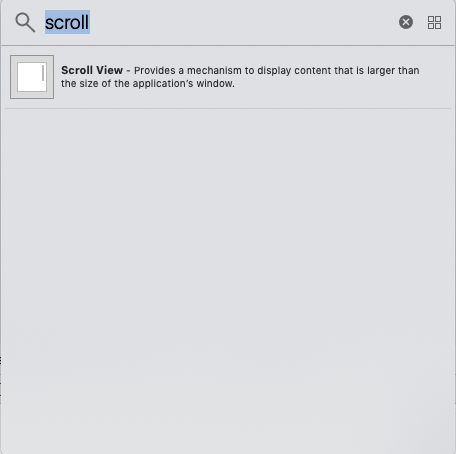
On the main.storyboard, look for the ScrollView and drag the result to the ViewController.
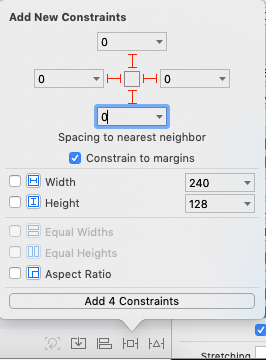
As seen in the following figure, define the ScrollView’s auto layout rules, or constraints.
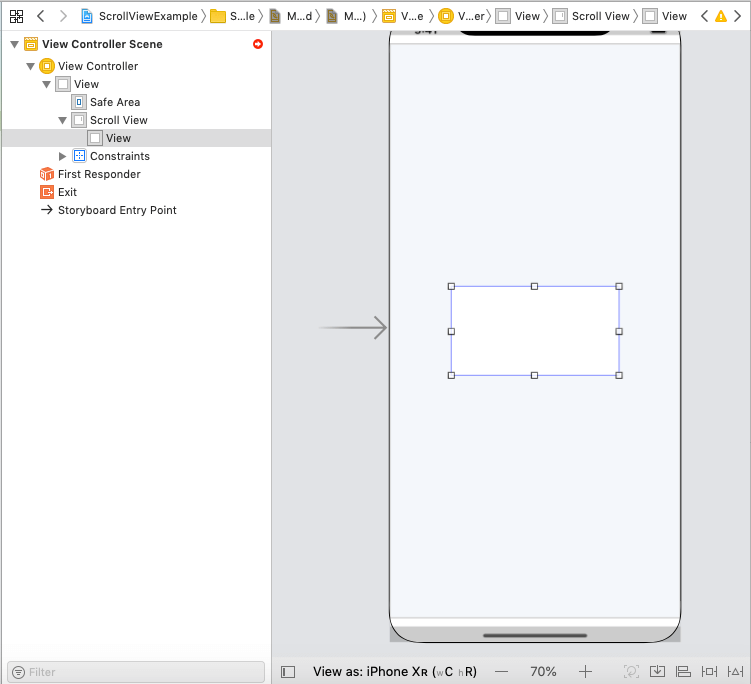
Define the auto-layout rules for the content view and add it to the ScrollView.
Assign the contentView from ScrollView the constraint margin 0. Additionally, we must equalize their height and width.
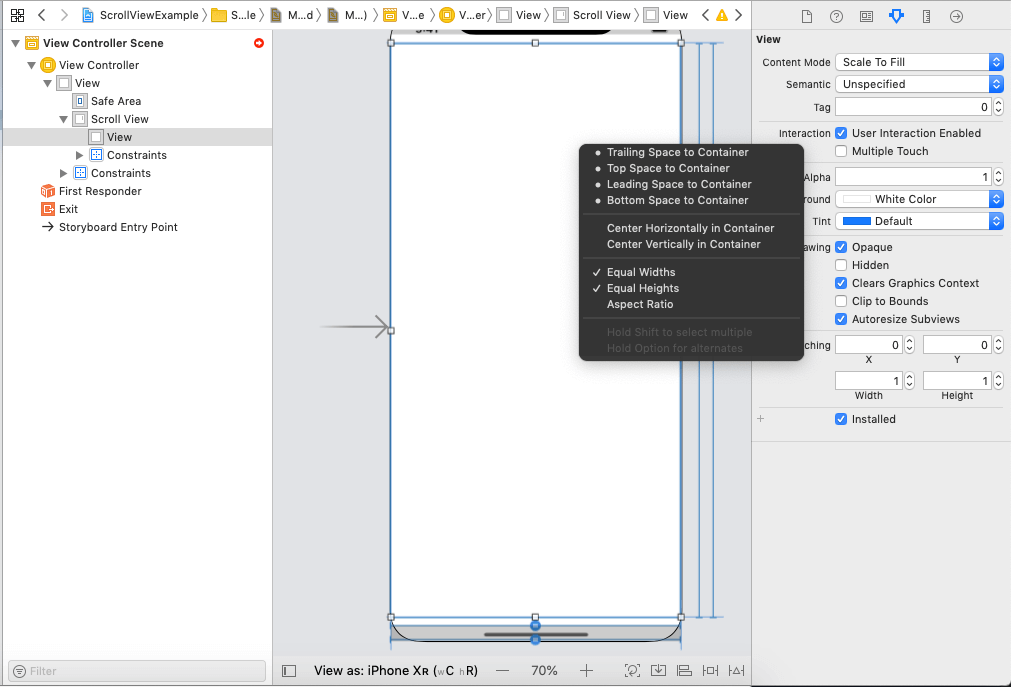
Reduce the ContentView’s priority to the minimum, as the image below illustrates. This is the most crucial step in the setup process since without it, the scrollview would not scroll.
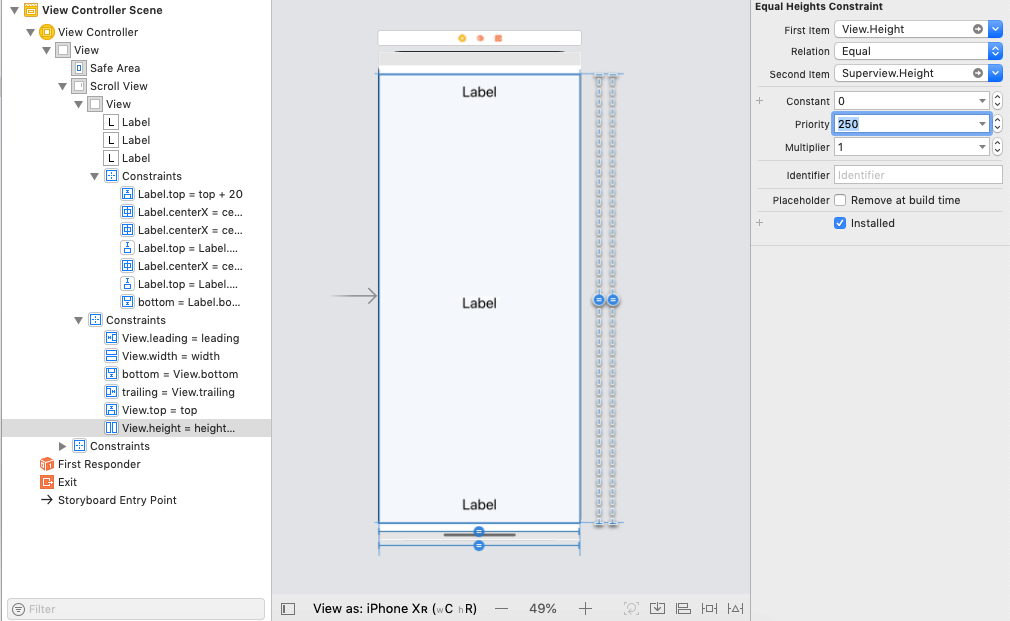
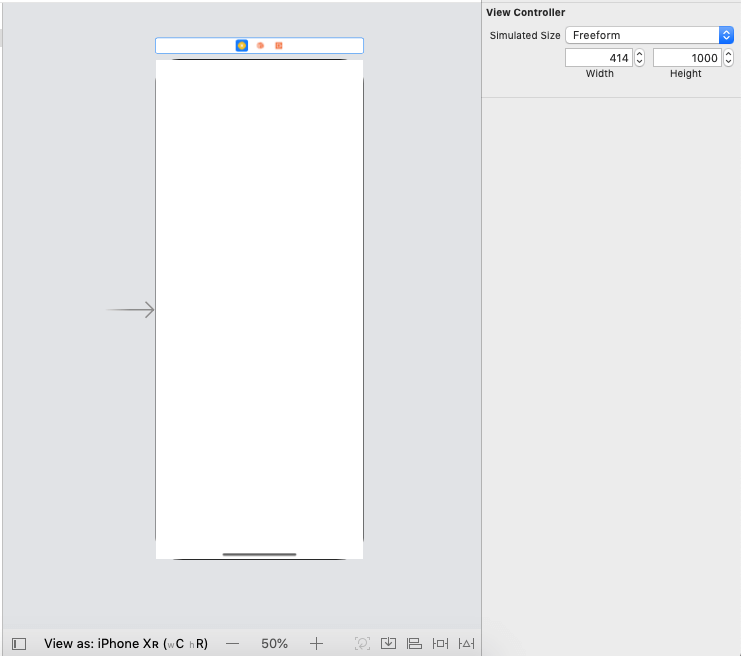
On the storyboard, we’ll have the ScrollView and the ContentView. Given that ScrollView functions in situations where the content size of the iPhone screen is not fully displayed. Using XCode’s size inspector, we provide the dimensions of the ViewController screen. The simulated size of the ViewController is set by default. But as shown in the figure below, we must make it freeform and give it a height that is higher than the screen’s existing height.
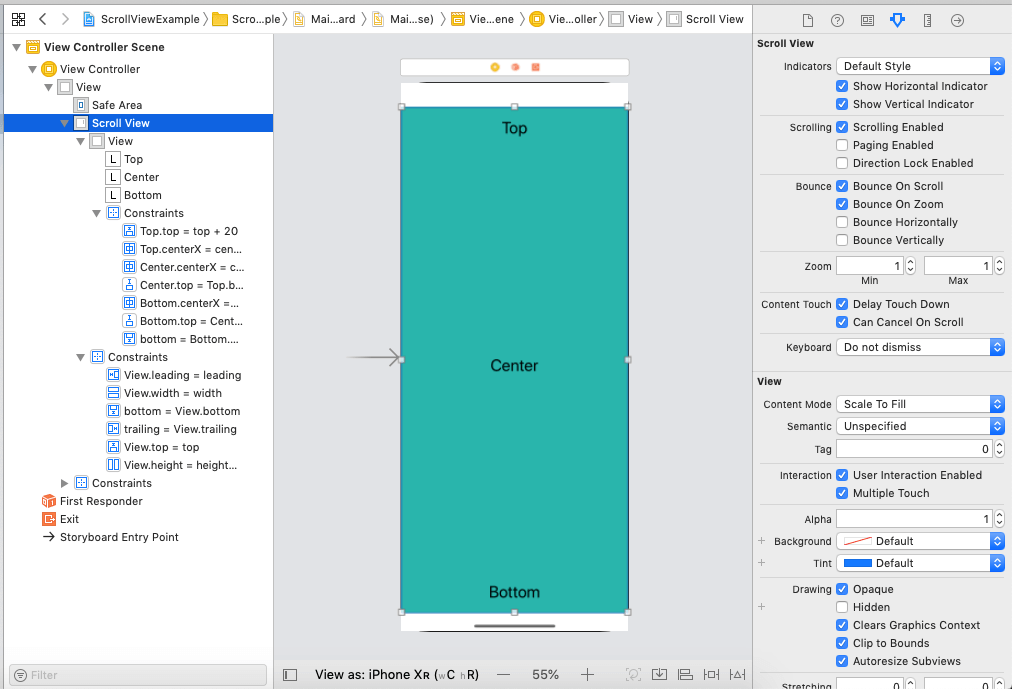
To verify whether or not the ScrollView is functioning, add a UILabel to its top, center, and bottom and specify the vertical distance between them. The interface builder should appear like the window below after the UILabels have been added and the background color has been adjusted.
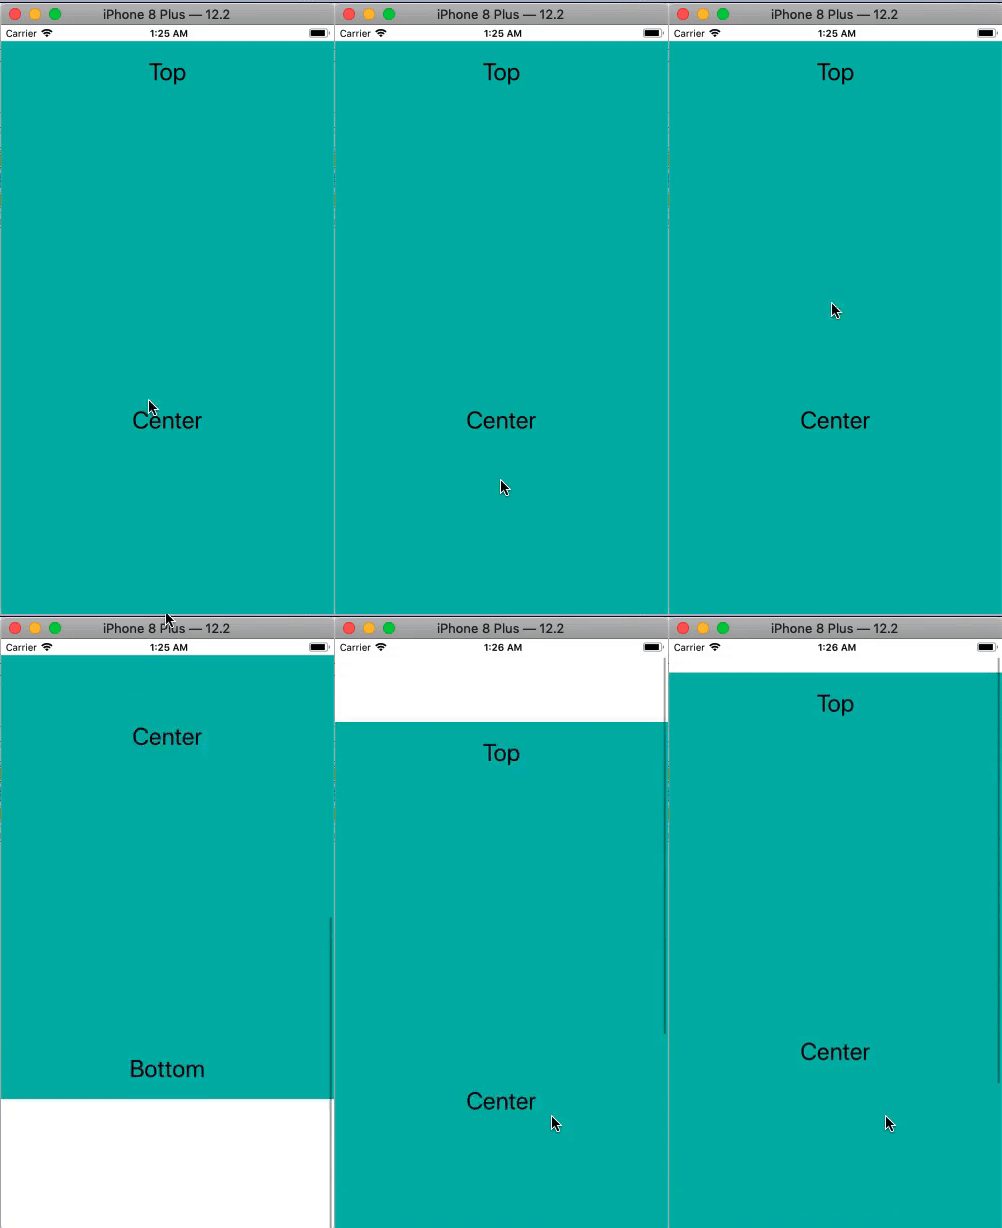
With the configuration shown above, the ScrollView will scroll to display the entire material on the screen.
ScrollView Properties
The following properties are present in the UIScrollView class.
| SN | Property | Type | Description |
|---|---|---|---|
| 1 | Delegate | UIScrollViewDelegate | It is the delegate of the ScrollView object. |
| 2 | contentSize | CGSize | It represents the size of the content view. |
| 3 | contentOffset | CGPoint | It represents the point at which the origin of the contentview is offset from the origin of ScrollView. |
| 4 | adjustedContentOffset | UIEdgeInsets | It represents the insets from the content inset and the safe area of the scroll view. |
| 5 | frameLayoutGuide | UILayoutGuide | The layout guide based on the untransformed frame rectangle of the scroll view. |
| 6 | contentLayoutGuide | UILayoutGuide | The layout guide based on the untranslated content rectangle of the scroll view. |
| 7 | isScrollEnabled | Bool | It represents the boolean value that tells whether the scroll view is enabled or not. |
| 8 | isDirectionLockEnabled | Bool | It represents the boolean value that tells whether the scroll view can be scrolled in a particular direction. |
| 9 | isPagingEnabled | Bool | It is a boolean value that represents whether then paging is enabled in a particular direction. |
| 10 | scrollsToTop | Bool | It is a boolean value that controls whether the scroll to top gesture is enabled or not. |
| 11 | bounces | Bool | It is a boolean value that represents whether the scroll view bounces over the edge of the content. |
| 12 | alwaysBounceVertical | Bool | It is a boolean value that represents whether bouncing always occurs when vertical scrolling reaches the end of the content. |
| 13 | alwaysBounceHorizontal | Bool | It is a boolean value that represents whether the bouncing always occurs when horizontal scrolling reaches the end of the content. |
| 14 | isTracking | Bool | It is a boolean value that represents whether the user touches the content to initiate scrolling |
| 15 | isDragging | Bool | It is a boolean value that represents whether the user has begun scrolling the content. |
| 16 | isDecelerating | Bool | It is a boolean value whether the content was moving in the scrollview when the user stopped dragging or lifted its finger. |
| 17 | decelerationRate | UIScrollView.DelcelerationRate | It is a floating-point value that determines the rate of deceleration after the user lifts their finger. |
| 18 | indicatorStyle | UIScrollView.IndicatorStyle | It represents the style of the scroll indicators. |
| 19 | showsHorizontalScrollsIndicator | Bool | It is a boolean value that represents whether the horizontal scroll indicator is visible or not. |
| 20 | showsVerticalScrollIndicator | Bool | It is a boolean value that represents whether the vertical scroll indicator is visible or not. |
| 21 | refreshControl | UIRefreshControl | It represents the refresh control associated with the scroll view. |
| 22 | canCancelContentTouches | Bool | It is a boolean value that controls. |
| 23 | delayContentTouches | Bool | It is a boolean value that reprents whether the scroll view delays the handling of touch-down gestures. |
| 24 | directionPressGestureRecognizer | UIGestureRecognizer | The underlying gesture recognizer for directional button presses. |
| 25 | panGestureRecognizer | UIPanGestureRecongnizer | The underlying gesture recognizer for pan gestures. |
| 26 | pinchGestureRecognizer | UIPinchGestureRecognizer | The underlying gesture recognizer for pinch gestures. |
| 27 | zoomScale | CGFloat | It is a floating-point value that scales the zooming of the content of the scroll view. |
| 28 | maximumZoomScale | CGFloat | It is a maximum floating-point value that can be applied to the zooming of the content of the scroll view. |
| 29 | minimumZoomScale | CGFloat | It is the minimum floating-point value that can be applied to the zooming of the content of the scroll view. |
| 30 | isZoomBouncing | Bool | It is a boolean value that represents whether the zooming has exceeded the associated scaling limits. |
| 31 | isZooming | Bool | It is a boolean value that represents whether the content view is currently zooming or not. |
| 32 | bouncesZoom | Bool | It is a boolean value that represents whether the scroll view animates the content scaling when the scaling exceeds the maximum or minimum limits. |
Example
This is a straightforward example where we will develop the ContentView and the ScrollView. To display the real content, we will create two UIViews inside the scroll view.
Interface Builder
We’ll utilize the scrollview in this example, which has a content view. Two uiviews will be displayed when the content view is scrolled. To achieve this, add the scrollview to the interface builder and add the scrollview to the interface by following the steps provided in this tutorial.
Define the UIView’s auto-layout rules and add it to the ScrollView. We must add two UIViews and a UIButton to the storyboard after adding the UIView (ContentView) to the scrollview.
We must establish some vertical spacing between the views and switch the ViewController size from fixed to freeform in order to make the ScrollView scrollable.
Configure the UIviews, ContentView, ScrollView, and submit button auto-layout rules.
AutoLayout Rules for ScrollView
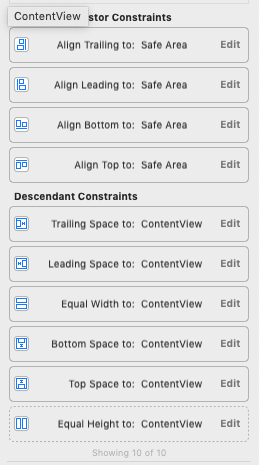
AutoLayout rules for ContentView
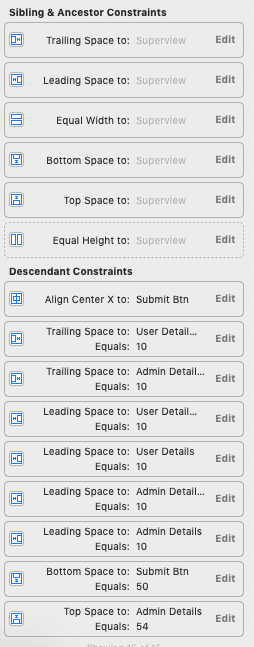
AutoLayout rules for AdminDetailsView
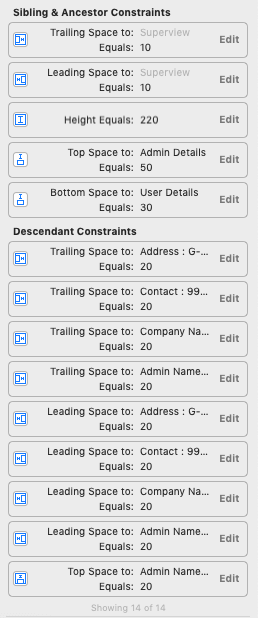
AutoLayout Rules for UserDetailView
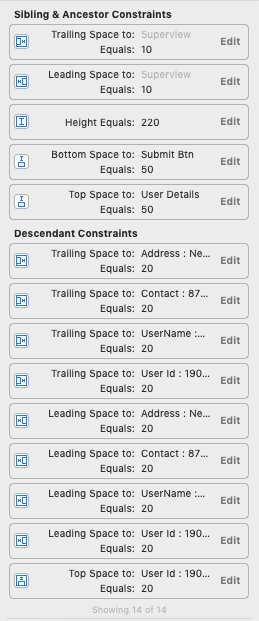
Main.storyboard
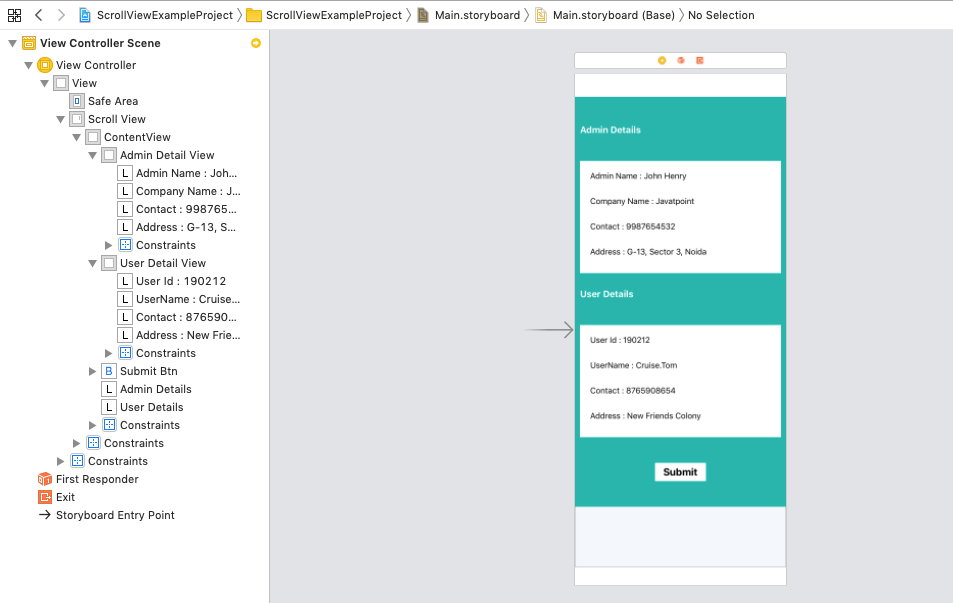
ViewController.swift
					import UIKit

class ViewController: UIViewController {

    @IBOutlet weak var adminDetailView: UIView!

    @IBOutlet weak var userDetailView: UIView!

    @IBOutlet weak var submitBtn: UIButton!

    override func viewDidLoad() {
        super.viewDidLoad()
        // Do any additional setup after loading the view.
        adminDetailView.layer.cornerRadius = 10
        adminDetailView.layer.borderColor = UIColor.black.cgColor
        adminDetailView.layer.borderWidth = 1
        adminDetailView.layer.shadowOffset = CGSize(width: 2, height: 2)
        adminDetailView.layer.shadowColor = UIColor.black.cgColor
        adminDetailView.layer.shadowRadius = 5

        userDetailView.layer.cornerRadius = 10
        userDetailView.layer.borderColor = UIColor.black.cgColor
        userDetailView.layer.borderWidth = 1
        userDetailView.layer.shadowOffset = CGSize(width: 2, height: 2)
        userDetailView.layer.shadowColor = UIColor.black.cgColor
        userDetailView.layer.shadowRadius = 5

        submitBtn.layer.cornerRadius = 10
        submitBtn.layer.borderColor = UIColor.black.cgColor
        submitBtn.layer.shadowColor = UIColor.black.cgColor

    }

}
Output
