iOS: Collection View
CollectionView
A collectionview, which is an instance of the UICollectionView class—which inherits the UIScrollView—is an object that displays the ordered collection of data items in the customisable layouts. The data is displayed as a grid layout. This will be addressed later in this lesson.
class UICollectionView : UIScrollView
The management of the data connected to the collectionview falls under the purview of the iOS application when we include it in the application interface. Since the CollectionView object obtains its data from the DataSource object, which complies with the UICollectionViewDataSource protocol, it functions similarly to a tableview.
In order to be displayed on the iPhone screen in a grid layout, the data related to the collection view is handled as separate objects that can be divided into parts. In most iOS applications, where we want the data to be scrollable horizontally, we utilize the UICollectionView.
For example, UICollectionVIew is used to display the products in an e-commerce application such as Flipkart. A calculator is an example of a very basic user interface (UI) that can be created with collectionview. The buttons are managed as individual collectionview items using the delegate and DataSource methods specified in the UICollectionViewDelegate and UICollectionViewDataSource protocols.
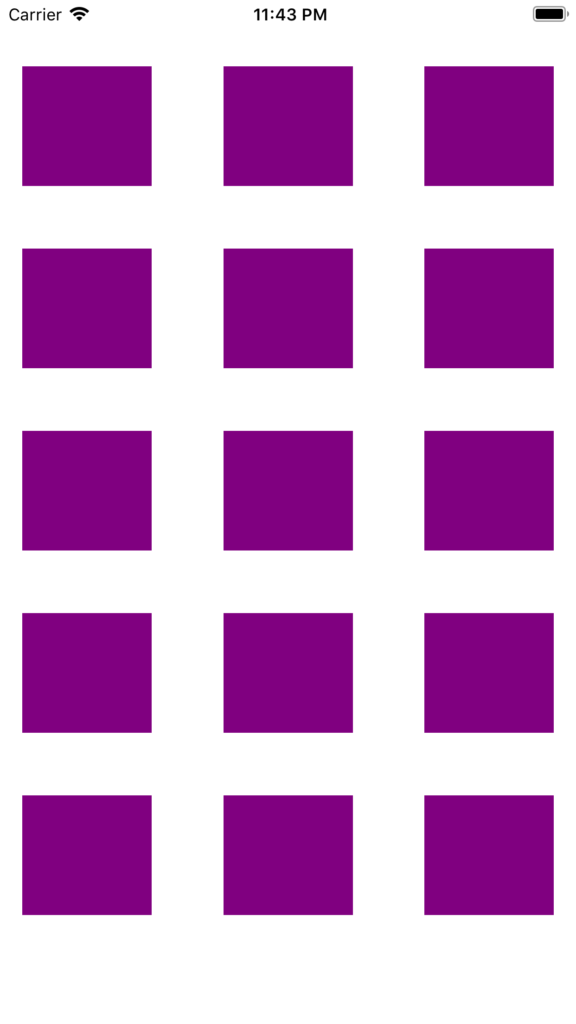
The data is displayed on the screen via the UICollectionView, as seen in the picture below.
Adding CollectionView to the interface builder
1. Look through the object library for the CollectionView and drag the result onto the storyboard.
2. In the ViewController, create the connection outlet for the collectionview.
3. In the ViewController, implement the UICollectionViewDataSource and UICollectionViewDelegate protocols, then assign the datasource and delegate objects to the self.
					collectionView.delegate = self
collectionView.dataSource = self
4. To create the collection view layout, define the delegate and datasource methods for the collection view.
UICollectionViewCell
In the tableview, it is comparable to UITableViewCell. The data is shown by CollectionView as an ordered collection of things. The smallest piece of data that may be displayed using the UICollectionView object is called an item. The item is displayed by the CollectionView using a cell that is a UICollectionViewCell instance. A reusable identifier is used by the datasource function to configure the UICollectionView cell. CollectionViewCell is used to configure a cell as seen below.
					func collectionView(_ collectionView: UICollectionView, cellForItemAt indexPath: IndexPath) -> UICollectionViewCell {
        let cell = collectionView.dequeueReusableCell(withReuseIdentifier: "cell", for: indexPath) as! MyCollectionviewCell
        cell.myView.backgroundColor = itemArr[indexPath.row]
        return cell
    }
Supplementary Views
The supplemental views can also be used by a CollectionView to display the data. The section headers and footers that are set up using the UICollectionViewDelegate methods are the supplemental views. The layout object for the collection view can define support for additional views. The locations of those views are likewise specified by the collection view layout object.
CollectionView Delegate methods
The UICollectionViewDatasource protocol is adopted by the CollectionView Datasource. The data requested by the collectionview must be provided by the collection view datasource object. It resembles the data model of the collectionview application. The data is passed to the collectionview for display.
The methods declared in the UICollectionViewDataSource protocol are shown in the following table.
| SN | Method | Description |
|---|---|---|
| 1 | func collectionView(UICollectionView, shouldSelectItemAt: IndexPath) -> Bool | This method asks the delegate to select the item at an indexpath. |
| 2 | func collectionView(UICollectionView, didSelectItemAt: IndexPath) | This method tells the delegate to select the item at an indexpath. This method is executed when the item at an indexpath in then collectionview is selected. |
| 3 | func collectionView(UICollectionView, shouldDeselectItemAt: IndexPath) -> Bool | This method asks the delegate to deselect the item at an indexpath. |
| 4 | func collectionView(UICollectionView, didDeselectItemAt: IndexPath) | This method is executed when the item at an indexpath in the collectionview is deselected. |
| 5 | func collectionView(UICollectionView, shouldBeginMultipleSelectionInteractionAt: IndexPath) -> Bool | It asks the delegate whether the multiple items can be selected using the two-finger pan gesture in the collection view. |
| 6 | func collectionView(UICollectionView, didBeginMultipleSelectionInteractionAt: IndexPath) | This method is executed when the multiple items are selected using the two-finger pan gesture. |
| 7 | func collectionView(UICollectionView, shouldHighlightItemAt: IndexPath) -> Bool | It asks then delegate whether to highlight the item during tracking. |
| 8 | func collectionView(UICollectionView, didHighlightItemAt: IndexPath) | This method is executed when the item is highlighted in the collectionview at some indexpath. |
CollectionView DataSource Methods
The UICollectionViewDatasource protocol is adopted by the CollectionView Datasource. The data requested by the collectionview must be provided by the collection view datasource object. It resembles the data model of the collectionview application. The data is passed to the collectionview for display.
The methods declared in the UICollectionViewDataSource protocol are shown in the following table.
| SN | Method | Description |
|---|---|---|
| 1 | func collectionView(UICollectionView, numberOfItemsInSection: Int) -> Int | This method returns an integer representing the number of items in section to be displayed in the collectionview. It is the count of the array of data associated with the collectionview. |
| 2 | func numberOfSections(in: UICollectionView) -> Int | This method returns an integer representing the number of sections to be displayed in the collectionview. |
| 3 | func collectionView(UICollectionView, cellForItemAt: IndexPath) -> UICollectionViewCell | This method returns the instance of UICollectionViewCell which is configured to display the actual content. This method is not optional and to be defined if the view controller is conforming UICollectionViewDataSource protocol. |
| 4 | func collectionView(UICollectionView, viewForSupplementaryElementOfKind: String, at: IndexPath) -> UICollectionReusableView | This method asks the data source object to provide a supplementary view to display in the collection view. |
| 5 | func collectionView(UICollectionView, canMoveItemAt: IndexPath) -> Bool | It asks the datasource object whether the specified item can be moved to another location in the collectionview. |
| 6 | func collectionView(UICollectionView, moveItemAt: IndexPath, to: IndexPath) | This method moves the specified item to the specified indexpath. |
| 7 | func indexTitles(for: UICollectionView) -> [String]? | This method returns the array of the string containing the titles of the indices. |
| 8 | func collectionView(UICollectionView, indexPathForIndexTitle: String, at: Int) -> IndexPath | It asks the data source object to return the index path of a collection view item that corresponds to one of the index entries. |
Example 1
In this example, a collection view will be used to display a grid of things on the screen.
Interface Builder (main.storyboard)
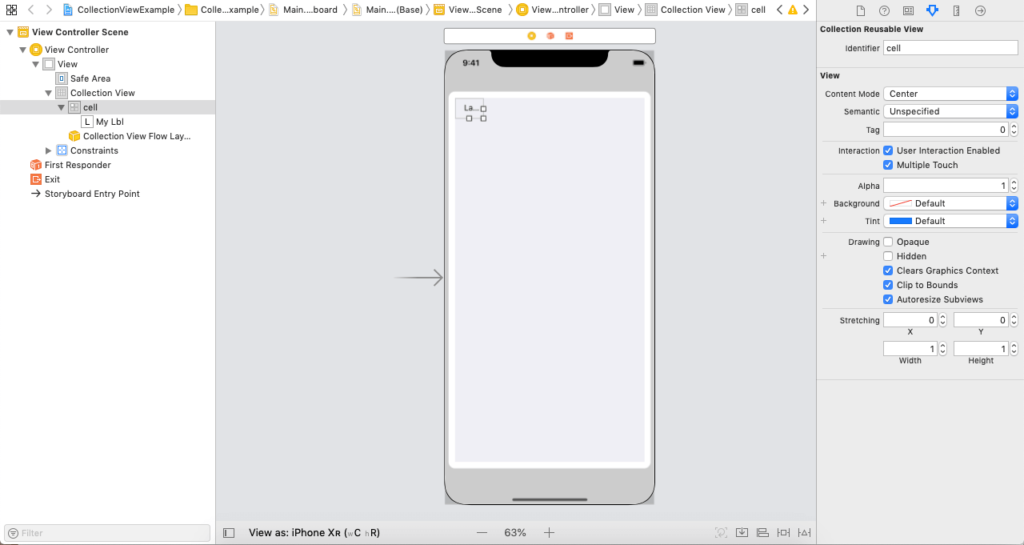
Find the collectionview in the object library and drag the result into the interface builder to add it to the project’s storyboard. The collectionview will now be a part of the UI. Set the collection view’s auto-layout rules now to control its size and placement across various screen sizes. The collectionview cell displays the CollectionView’s real content. In the Xcode attribute inspector, we must declare the properties for the cell. In this example, we set the text for the label in the data source method on the cell object and add the label to the collectionview cell.
The following image displays the properties assigned to the collectionview cell.

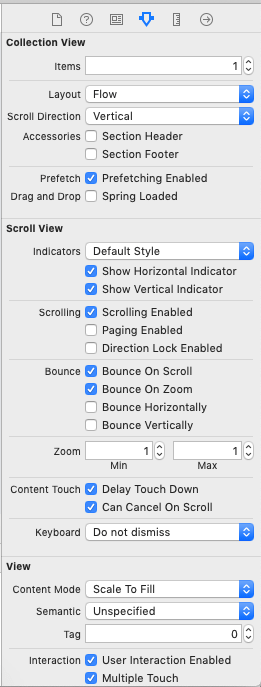
The following graphic displays the attributes assigned to the collection view.
The project’s interface builder can be seen below.
ViewController.swift
					import UIKit

class ViewController: UIViewController {


    @IBOutlet weak var collectionView: UICollectionView!

    var itemArr = Array<String>()

    override func viewDidLoad() {
        super.viewDidLoad()
        // Do any additional setup after loading the view.
        collectionView.delegate = self
        collectionView.dataSource = self
        for i in 1...60{
            itemArr.append(i.description)
        }
    }
}


extension ViewController : UICollectionViewDelegate{

}


extension ViewController : UICollectionViewDataSource{

    func collectionView(_ collectionView: UICollectionView, numberOfItemsInSection section: Int) -> Int {
        return itemArr.count
    }

    func collectionView(_ collectionView: UICollectionView, cellForItemAt indexPath: IndexPath) -> UICollectionViewCell {
        let cell = collectionView.dequeueReusableCell(withReuseIdentifier: "cell", for: indexPath) as! MyCollectionViewCell

        cell.myLbl.text = itemArr[indexPath.item]
        cell.myLbl.layer.borderColor = UIColor.blue.cgColor
        cell.myLbl.textAlignment = .center
        cell.myLbl.layer.cornerRadius = 10
        cell.myLbl.layer.borderWidth = 2

        return cell
    }
}
MyCollectionViewCell.swift
					import UIKit


class MyCollectionViewCell: UICollectionViewCell {

    @IBOutlet weak var myLbl: UILabel!

}
Output
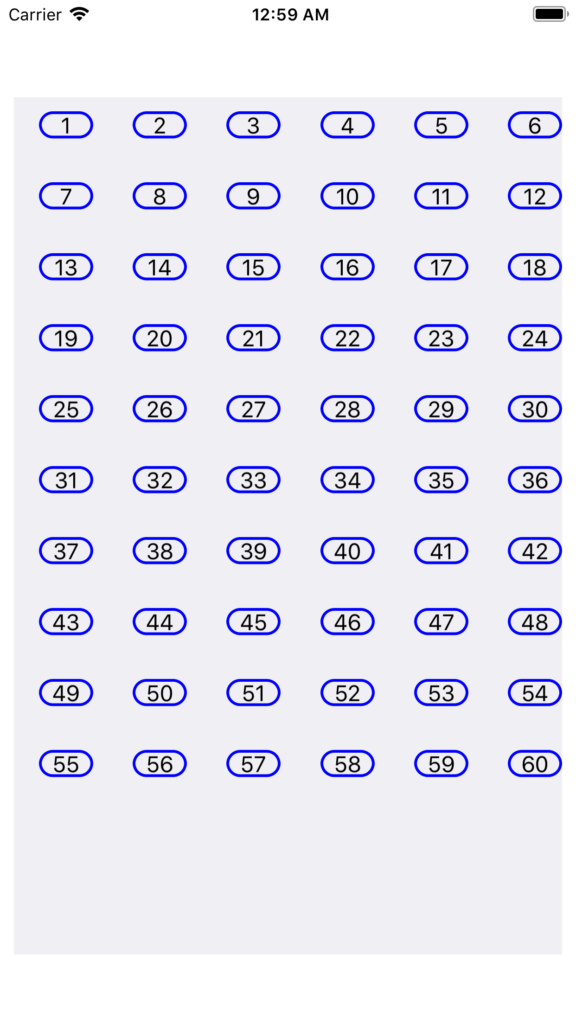
CollectionView Demo Project
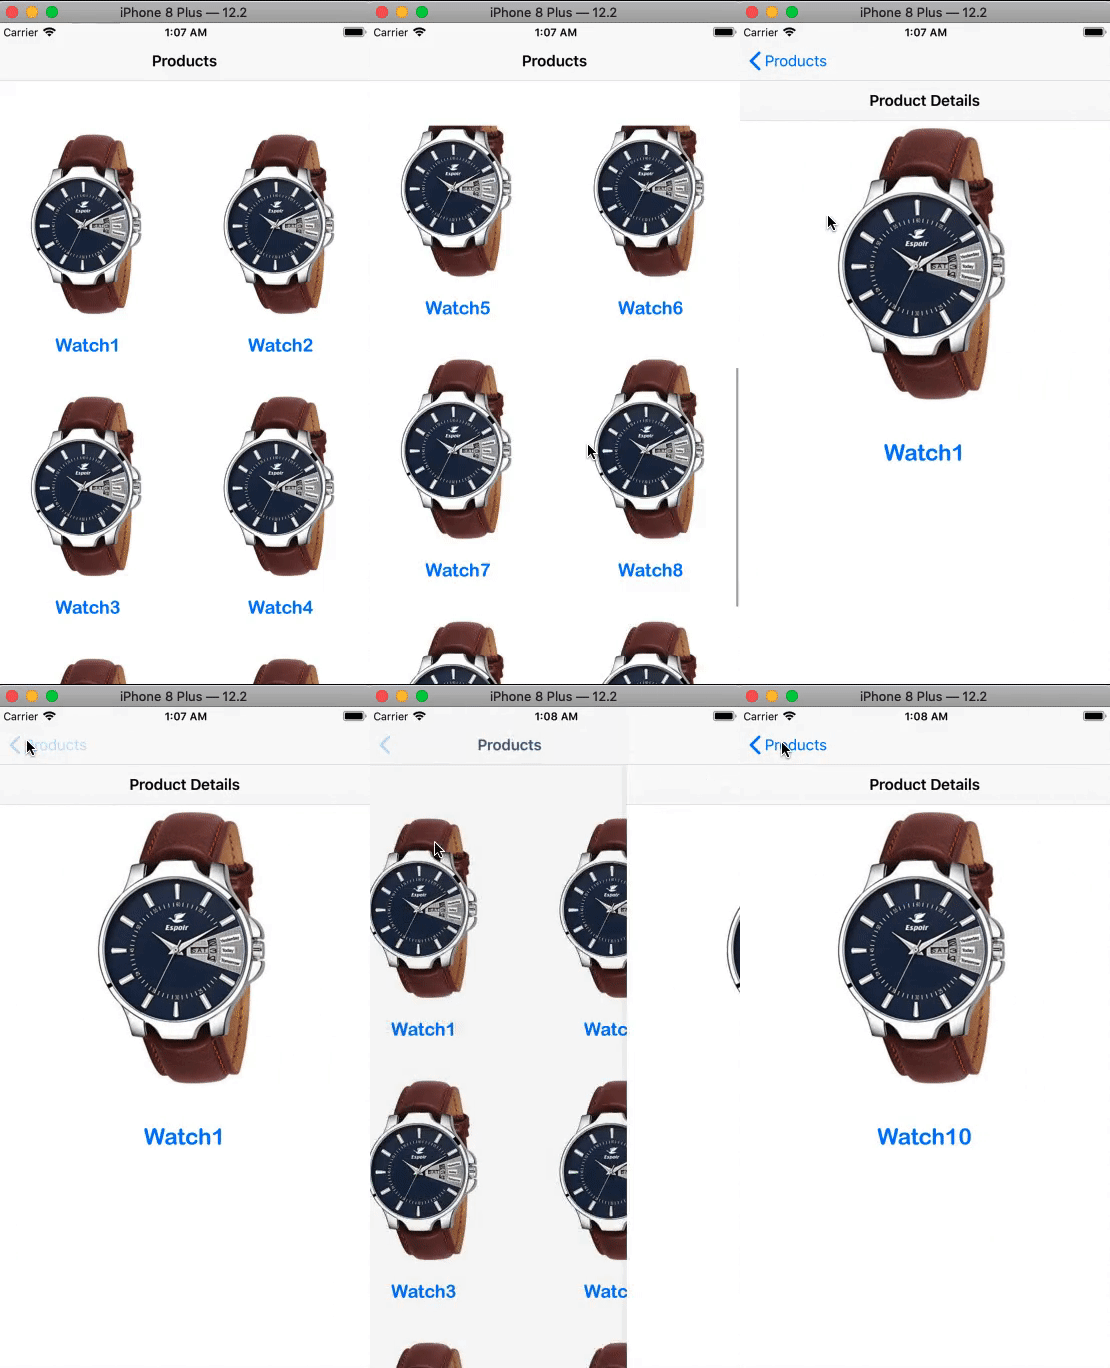
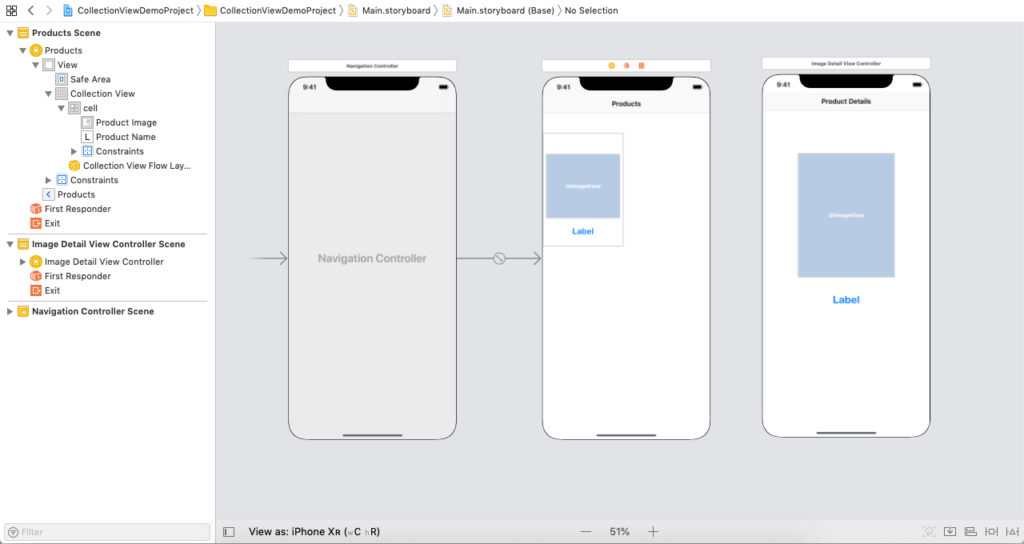
This example demonstrates the intended use of the collection view in iOS applications. This application displays several products on a view controller scene, simulating an e-commerce application. When we click on a product, a new screen with a thorough view of that particular product appears.
Two view controllers will be used in this application, and they will be embedded within the navigation controller to enable navigating via the view controllers. It is recommended that you possess a rudimentary understanding of navigation controllers, which is what this lesson covers.
Interface Builder (main.storyboard)
In this project, a collectionview will be used to display a scene in the application that resembles a grid. Drag the resultant collection view to the storyboard after doing a search for it in the object library.
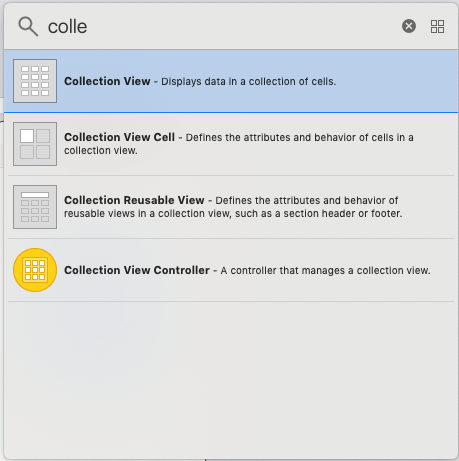
Configure the cell
The prototype cell that will display the real item on the screen needs to be configured now. The picture view and label for the product image and image name, respectively, will be located in the prototype cell. To establish the connection outlets for the imageview and label, respectively, add the imageview and the label to the collectionview cell and give the cell the class DemoCollectionViewCell.swift.

Add the navigation controller
The view controller will be selected, the editor will be clicked, and the option to embed in will be selected, as seen in the following image, to embed the view controller to a navigation controller.
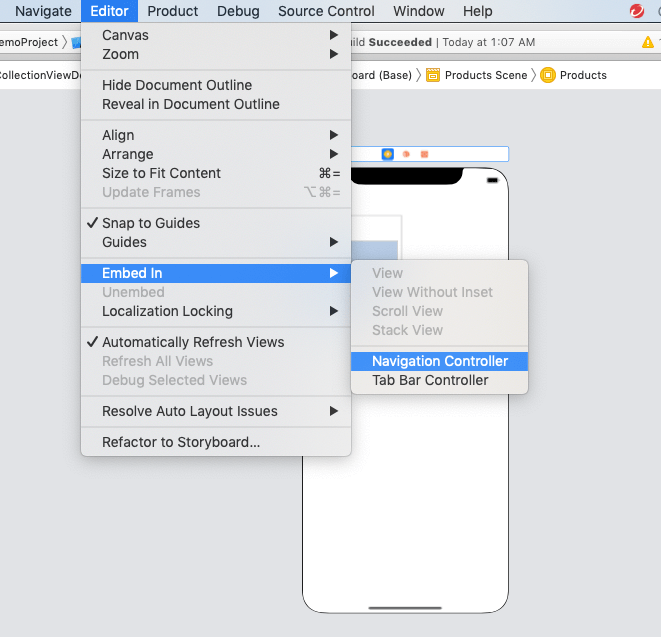
A navigation bar appears on all view controllers by default when we embed our view controllers into the navigation controller. We are able to change the navigation bar’s title. When we talk about navigation interface later in this lesson, we will have studied more about navigation controllers. The view controller and navigation controller, for which we have set the navigation bar title to Products, are displayed in the following image.
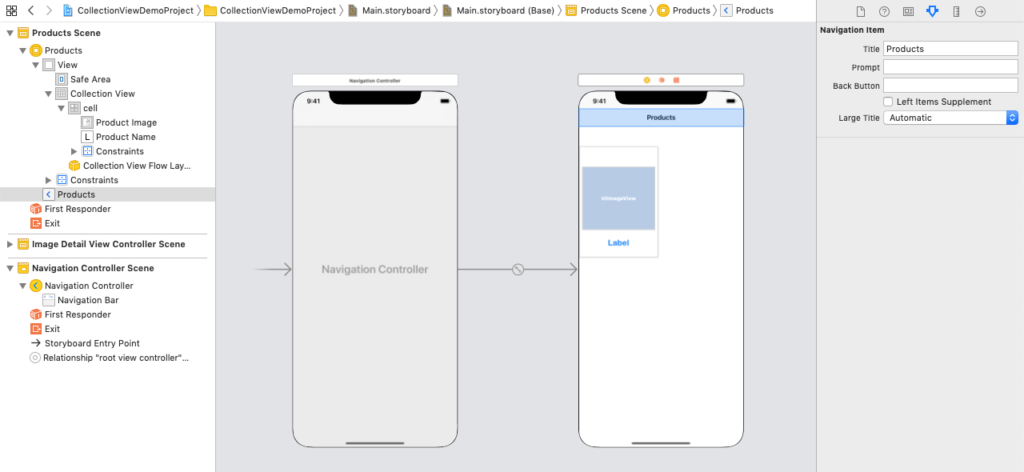
Adding ImageDetailViewController
We require a ViewController to display product details to the interface builder. We will add ViewController to the interface builder and give this ViewController the class ImageDetailViewController in order to accomplish this.
We will add the ImageView and the label to the ViewController to the imageDetailViewController. Additionally, we’ll set the navigation bar title to “Product Details” and integrate this view controller into our navigation controller.
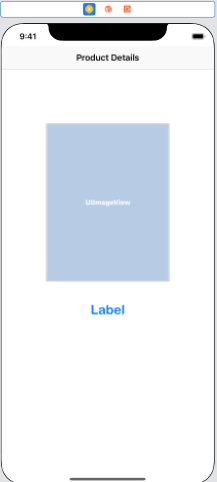
When an item in the CollectionView is selected, the ImageDetailViewController will be shown. To access this view controller, we will put the following code in the collectionview datasource method.
					let imageDetailVC = self.storyboard?.instantiateViewController(withIdentifier: "ImageDetailViewController") as! ImageDetailViewController

        imageDetailVC.img = imgArr[indexPath.row]
        imageDetailVC.name = lblArr[indexPath.row]
        self.navigationController?.pushViewController(imageDetailVC, animated: true)
The back button on a view controller that receives a push from a navigation controller activates, allowing the view controller to move backward in the storyboard.
The following image displays the interface builder that was included in the sample project.
ViewController.swift
					import UIKit


class ViewController: UIViewController {


    var imgArr = Array<UIImage>()
    var lblArr = Array<String>()


    @IBOutlet weak var collectionView: UICollectionView!

    override func viewDidLoad() {
        super.viewDidLoad()
        // Do any additional setup after loading the view.
        collectionView.delegate = self
        collectionView.dataSource = self
        for i in 1...10{
            lblArr.append("Watch"+i.description)
        }
        imgArr = [ imageLiteral(resourceName: "watch1"), imageLiteral(resourceName: "watch1"), imageLiteral(resourceName: "watch1"), imageLiteral(resourceName: "watch1"), imageLiteral(resourceName: "watch1"), imageLiteral(resourceName: "watch1"), imageLiteral(resourceName: "watch1"), imageLiteral(resourceName: "watch1"), imageLiteral(resourceName: "watch1"), imageLiteral(resourceName: "watch1")]
    }

}


extension ViewController:UICollectionViewDataSource{
    func collectionView(_ collectionView: UICollectionView, numberOfItemsInSection section: Int) -> Int {
        return lblArr.count
    }

    func collectionView(_ collectionView: UICollectionView, cellForItemAt indexPath: IndexPath) -> UICollectionViewCell {
        let cell = collectionView.dequeueReusableCell(withReuseIdentifier: "cell", for: indexPath) as! DemoCollectionViewCell
        cell.productImage.image = imgArr[indexPath.row]
        cell.productName.text = lblArr[indexPath.row]
        return cell
    }

    func collectionView(_ collectionView: UICollectionView, didSelectItemAt indexPath: IndexPath) {
        let imageDetailVC = self.storyboard?.instantiateViewController(withIdentifier: "ImageDetailViewController") as! ImageDetailViewController

        imageDetailVC.img = imgArr[indexPath.row]
        imageDetailVC.name = lblArr[indexPath.row]
        self.navigationController?.pushViewController(imageDetailVC, animated: true)
    }
}


extension ViewController:UICollectionViewDelegate{

}
ImageDetailViewController
					import UIKit


class ImageDetailViewController: UIViewController {

    @IBOutlet weak var productImage: UIImageView!

    @IBOutlet weak var productName: UILabel!

    var img:UIImage!
    var name:String!

    override func viewDidLoad() {
        super.viewDidLoad()

        // Do any additional setup after loading the view.
        productName.text = name
        productImage.image = img
    }
}
DemoCollectionViewCell.swift
					import UIKit


class DemoCollectionViewCell: UICollectionViewCell {

    @IBOutlet weak var productImage: UIImageView!

    @IBOutlet weak var productName: UILabel!
}
Output
