iOS: UI View
One way to define UIView is as an object that allows us to build and control the rectangular portion of the screen. To establish a hierarchical structure for the UIViews, we can have any number of views inside of a view.
The attributes and methods defined in the UIView class, which is an inheritor of UIKit, are used to manage the UIView. The following is the declaration for UIView.
class UIView : UIKit
- Animation and drawing
- We can draw into the rectangle portion of the screen by using views.
- Layout and Sub view management
- The UIView can have one or more subviews embedded in it. Controlling the look of the super view can also control the appearance of the subviews.
- To control the view hierarchy’s size and placement on various iOS devices, we can create auto-layout rules.
- Event Handling
- Since a view is a subclass of UIResponder, it can react to touch events as well as other types of events.
- For the uiview, we can add gesture recognizers like UITapGestureRecognizer.
Creating UIView
You can programmatically build a view by instantiating the UIView class. Within the UIView constructor, we are able to supply the frame object. Many objects, like as text fields and labels, directly inherit the UIView class in iOS application development in order to utilize its common attributes and methods.
					let rect = CGRect(x: 10, y: 10, width: 100, height: 100)
let myView = UIView(frame: rect)
Example
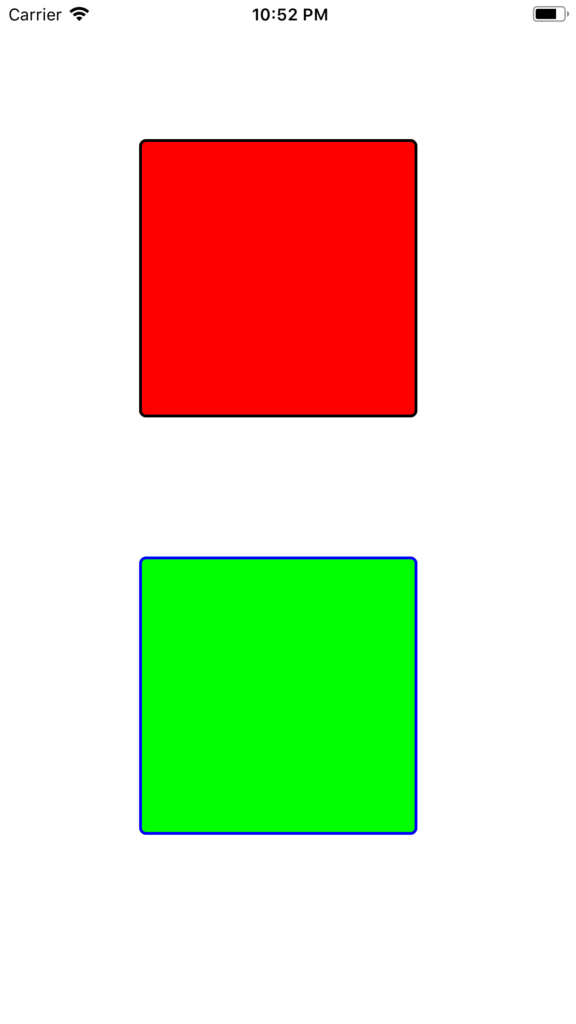
In this example, we will use programming to construct two UIViews and set their settings at the same time.
ViewController.swift
					import UIKit

class ViewController: UIViewController {

    override func viewDidLoad() {
        super.viewDidLoad()
        // Do any additional setup after loading the view.
        let frame1 = CGRect(x: 100, y: 100, width: 200, height: 200)
        let myView1 = UIView(frame: frame1)
        myView1.layer.shadowColor = UIColor.black.cgColor
        myView1.layer.borderColor = UIColor.black.cgColor
        myView1.layer.borderWidth = 2
        myView1.layer.cornerRadius = 5
        myView1.layer.shadowRadius = 2

        let frame2 = CGRect(x:100, y:400, width: 200, height: 200)
        let myView2 = UIView(frame: frame2)
        myView2.layer.shadowColor = UIColor.blue.cgColor
        myView2.layer.borderColor = UIColor.blue.cgColor
        myView2.layer.borderWidth = 2
        myView2.layer.cornerRadius = 5
        myView2.layer.shadowRadius = 2

        myView2.backgroundColor = .green
        myView1.backgroundColor = .red
        view.addSubview(myView1)
        view.addSubview(myView2)
    }
}

Example
We will imitate the iOS application’s web page structure in this example. We will use UIViews in the iOS applications for this kind of application where we need to show distinct modifications.
Interface builder
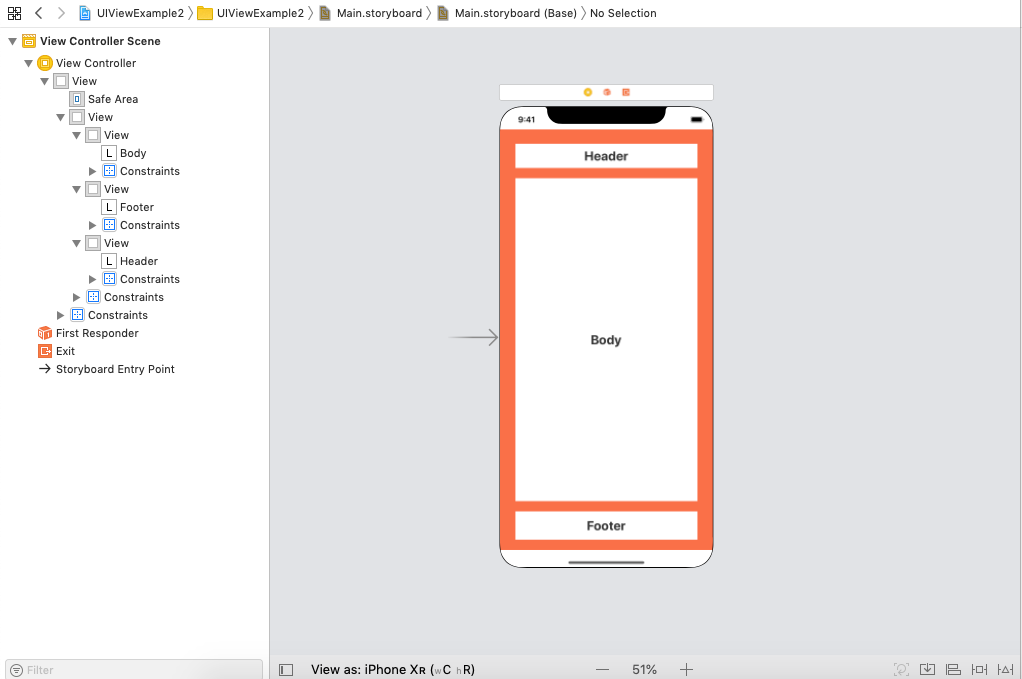
The interface builder (main.storyboard) that was created for the project is displayed in the following picture. The hierarchy of views and labels used in the project is displayed in the window’s left pane.

ViewController.swift
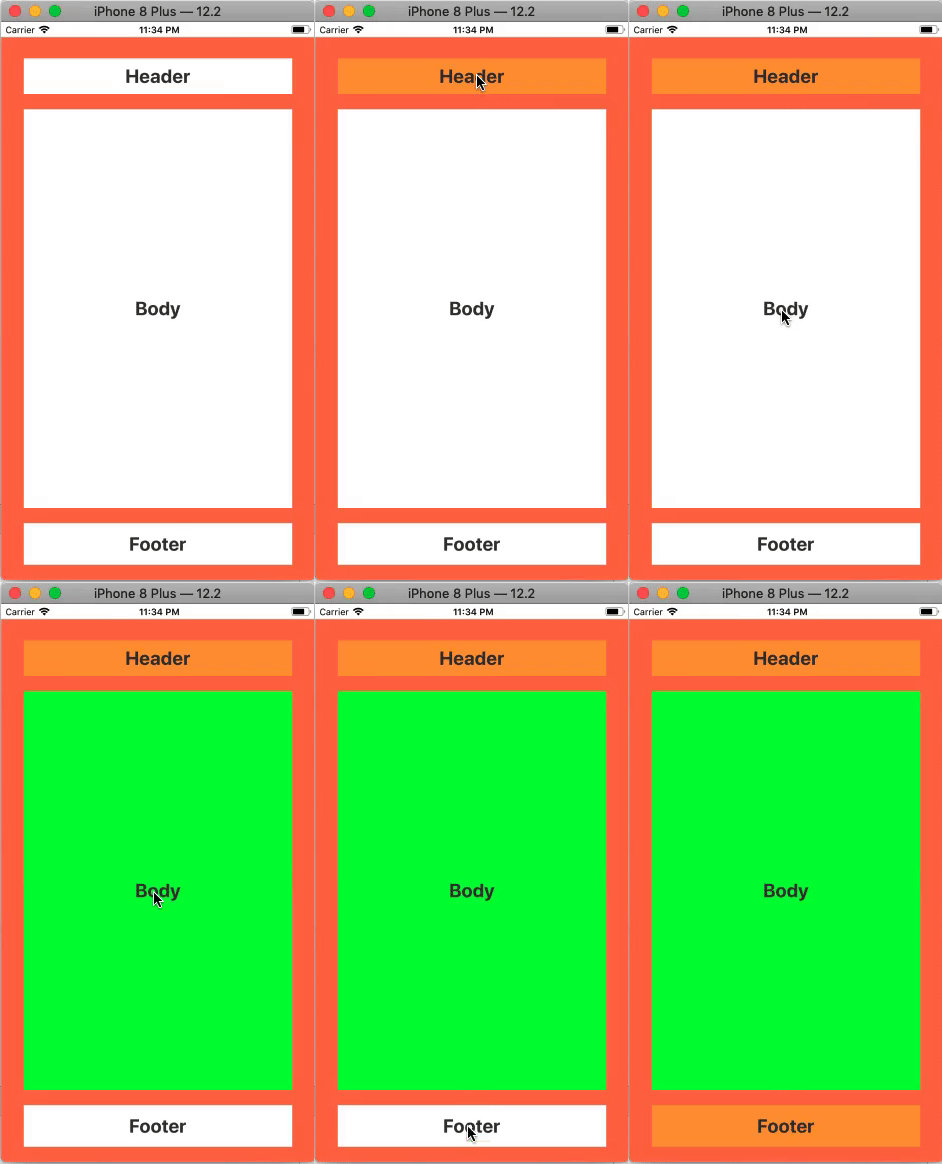
To modify the appearance of the UIView connected to a label, we will add the behavior for the labels to the ViewController code.
					import UIKit

class ViewController: UIViewController {

    @IBOutlet weak var headerView: UIView!

    @IBOutlet weak var bodyView: UIView!

    @IBOutlet weak var footerView: UIView!

    @IBOutlet weak var headerLbl: UILabel!

    @IBOutlet weak var bodyLbl: UILabel!

    @IBOutlet weak var footerLbl: UILabel!

    override func viewDidLoad() {
        super.viewDidLoad()
        // Do any additional setup after loading the view.

        let headerTapGestureRecognizer = UITapGestureRecognizer(target: self, action: #selector(headerLblTapped))
        headerLbl.isUserInteractionEnabled = true
        headerLbl.addGestureRecognizer(headerTapGestureRecognizer)

        let bodyTapGestureRecognizer = UITapGestureRecognizer(target: self, action: #selector(bodyLblTapped))
        bodyLbl.isUserInteractionEnabled = true
        bodyLbl.addGestureRecognizer(bodyTapGestureRecognizer)


        let footerTapGestureRecognizer = UITapGestureRecognizer(target: self, action: #selector(footerLblTapped))
        footerLb
        l.isUserInteractionEnabled = true
        footerLbl.addGestureRecognizer(footerTapGestureRecognizer)
    }

    @objc func headerLblTapped(){
        headerView.backgroundColor = .orange
    }

    @objc func bodyLblTapped(){
        bodyView.backgroundColor = .green

    }

    @objc func footerLblTapped(){
        footerView.backgroundColor = .orange
    }
}
Output

