HTML Classes

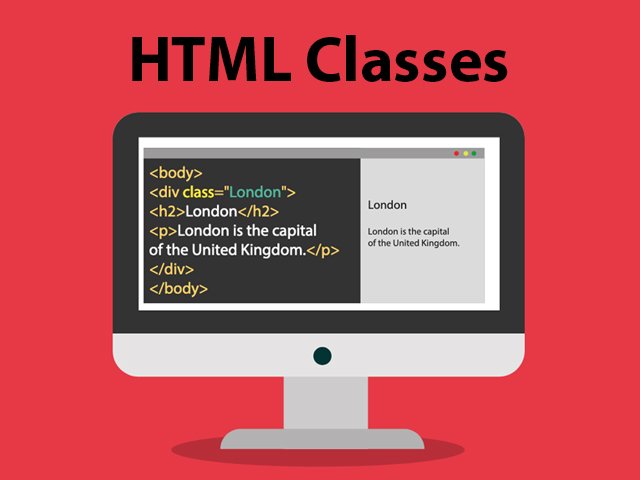
An HTML element’s class can be specified using the HTML classes property.
The same class might be shared by several HTML components.
Using The class Attribute
In a style sheet, the class attribute is frequently used to point to a class name. JavaScript can also use it to access and work with elements that have that particular class name.
Three <div> elements with the class attribute set to “city” are shown in the example below. The head section’s .city style definition will be applied uniformly to all three of the <div> elements:
Example
					<!DOCTYPE html>
<html>
<head>
<style>
.city {
  background-color: tomato;
  color: white;
  border: 2px solid black;
  margin: 20px;
  padding: 20px;
}
</style>
</head>
<body>

<div class="city">
  <h2>Berlin</h2>
  <p>Berlin is the capital of Germany.</p>
</div>

<div class="city">
  <h2>Rome</h2>
  <p>Rome is the capital of Italy.</p>
</div>

<div class="city">
  <h2>Tokyo</h2>
  <p>Tokyo is the capital of Japan.</p>
</div>

<script>class RocketElementorAnimation{constructor(){this.deviceMode=document.createElement("span"),this.deviceMode.id="elementor-device-mode",this.deviceMode.setAttribute("class","elementor-screen-only"),document.body.appendChild(this.deviceMode)}_detectAnimations(){let t=getComputedStyle(this.deviceMode,":after").content.replace(/"/g,"");this.animationSettingKeys=this._listAnimationSettingsKeys(t),document.querySelectorAll(".elementor-invisible[data-settings]").forEach(t=>{const e=t.getBoundingClientRect();if(e.bottom>=0&&e.top<=window.innerHeight)try{this._animateElement(t)}catch(t){}})}_animateElement(t){const e=JSON.parse(t.dataset.settings),i=e._animation_delay||e.animation_delay||0,n=e[this.animationSettingKeys.find(t=>e[t])];if("none"===n)return void t.classList.remove("elementor-invisible");t.classList.remove(n),this.currentAnimation&&t.classList.remove(this.currentAnimation),this.currentAnimation=n;let s=setTimeout(()=>{t.classList.remove("elementor-invisible"),t.classList.add("animated",n),this._removeAnimationSettings(t,e)},i);window.addEventListener("rocket-startLoading",function(){clearTimeout(s)})}_listAnimationSettingsKeys(t="mobile"){const e=[""];switch(t){case"mobile":e.unshift("_mobile");case"tablet":e.unshift("_tablet");case"desktop":e.unshift("_desktop")}const i=[];return["animation","_animation"].forEach(t=>{e.forEach(e=>{i.push(t+e)})}),i}_removeAnimationSettings(t,e){this._listAnimationSettingsKeys().forEach(t=>delete e[t]),t.dataset.settings=JSON.stringify(e)}static run(){const t=new RocketElementorAnimation;requestAnimationFrame(t._detectAnimations.bind(t))}}document.addEventListener("DOMContentLoaded",RocketElementorAnimation.run);</script></body>
</html>
Two <span> elements with the class attribute set to “note” are shown in the example below. The head section’s .note style definition will apply an equal style to both <span> elements:
Example
					<!DOCTYPE html>
<html>
<head>
<style>
.note {
  font-size: 120%;
  color: red;
}
</style>
</head>
<body>

<h1>My <span class="note">Important</span> Title</h1>
<p>This is some <span class="note">important</span> text.</p>

</body>
</html>
The <div> element has no required attributes, but style, class and id are common.
The Syntax For Class
Put a class name after the period (.) character to create a new class. Next, specify the CSS attributes enclosed in curly brackets {}:
Example
Create a class named “city”:
					<!DOCTYPE html>
<html>
<head>
<style>
.city {
  background-color: tomato;
  color: white;
  padding: 10px;
}
</style>
</head>
<body>

<h2 class="city">Berlin</h2>
<p>Berlin is the capital of Germany.</p>

<h2 class="city">Rome</h2>
<p>Rome is the capital of Italy.</p>

<h2 class="city">Tokyo</h2>
<p>Tokyo is the capital of Japan.</p>

</body>
</html>
Multiple Classes
Elements in HTML are capable of being in several classes.
When defining multiple classes, use a space between the class names, like in <div class=”city main”>. The element will be styled in accordance with each of the listed classes.
The first <h2> element in the example below is a member of both the main class and the city class, and it will inherit the CSS styles from both:
Example
					<h2 class="city main">Berlin</h2>
<h2 class="city">Rome</h2>
<h2 class="city">Tokyo</h2>
Different Elements Can Share Same Class
The class name of one HTML element can be referenced by another.
Both <h2> and <p> in the example below refer to the “city” class and will use the same style:
Example
					<h2 class="city">Berlin</h2>
<p class="city">Berlin is the capital of Germany</p>
Use of The class Attribute in JavaScript
JavaScript can also use the class name to carry out particular actions for particular items.
JavaScript’s getElementsByClassName() function allows it to retrieve elements with a given class name:
Example
Click on a button to hide all elements with the class name “city”:
					<script>
function myFunction() {
  var x = document.getElementsByClassName("city");
  for (var i = 0; i < x.length; i++) {
    x[i].style.display = "none";
  }
}
</script>
Chapter Summary
- The HTML class attribute specifies one or more class names for an element
- Classes are used by CSS and JavaScript to select and access specific elements
- The class attribute can be used on any HTML element
- The class name is case sensitive
- Different HTML elements can point to the same class name
- JavaScript can access elements with a specific class name with the getElementsByClassName() method
HTML classes
CSS class
class attribute
multiple classes
class name
class selector
getElementsByClassName()
HTML
HTML5
HTML tutorials
Learn HTML
Free HTML tutorials
HTML Example
HTML Explained
HTML Classes: Organizing Your Web Content
In the world of web development, HTML classes play a crucial role in structuring and styling your web content. Classes allow you to group elements together and apply specific styles or behaviors to them, making your code more organized and maintainable.
An HTML class is an attribute that you can assign to one or more HTML elements. The class attribute is used to identify the element and associate it with a specific set of styles or functionality. This is particularly useful when you have multiple elements that share similar characteristics or need to be styled in a consistent manner.
To assign a class to an HTML element, you use the class attribute, like this:
This is a div with a class.
You can then use CSS to target the elements with that class and apply styles accordingly. For example:
.my-class {
background-color: #f1f1f1;
padding: 20px;
}
Additionally, you can assign multiple classes to a single element, separating them with a space:
This div has multiple classes.
This allows you to combine and apply different sets of styles to the same element, making your design more flexible and modular.
Another useful feature of HTML classes is the ability to select elements by their class using JavaScript. The `getElementsByClassName()` method allows you to retrieve a collection of elements with a specific class name, which can be helpful for manipulating or interacting with those elements programmatically.
By understanding and effectively utilizing HTML classes, you can create more organized and maintainable web content, making it easier to style and interact with your web pages.
