Table Resizing
Table Resizing
Table dimensions are modifiable.
The purpose of resizing is to change the table’s range.
A table can be resized in three different ways.
- Resize table command
- Drag to resize
- Adding headers
Note: Resizing will continue formatting and formulas. This will be covered in a later chapter.
Resize Table Command
You can input a range to modify the table’s size using the resize table command.
For instance, by typing A1:D10.
The command can be accessed via the Table Design tab on the Ribbon.

Example - Resizing a Table
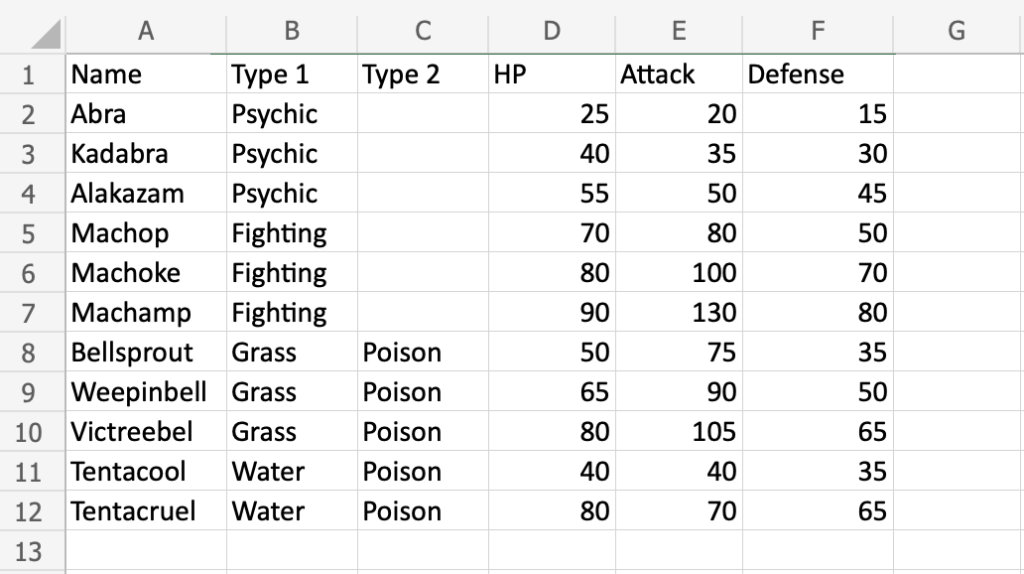
Make a table out of the range.
Now let’s change the table’s size from A1:F12 to A1:F20.
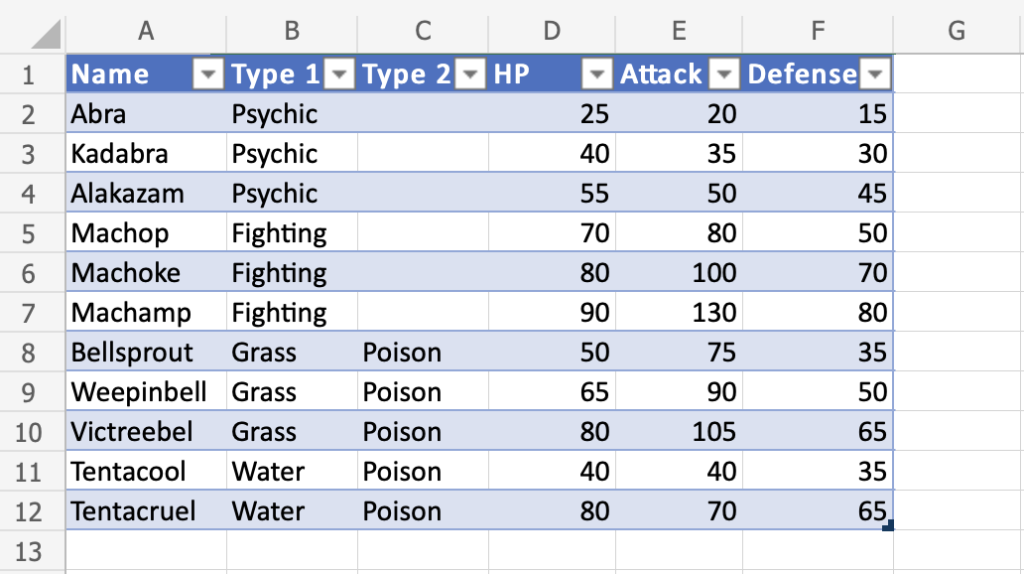
- Select the table
- Click the Table Design menu

- Click the Resize Table command (
)
Clicking the Resize Table command allows you to set a new range for the table.
4. Click the range input field
5. Type the new range, A1:F20
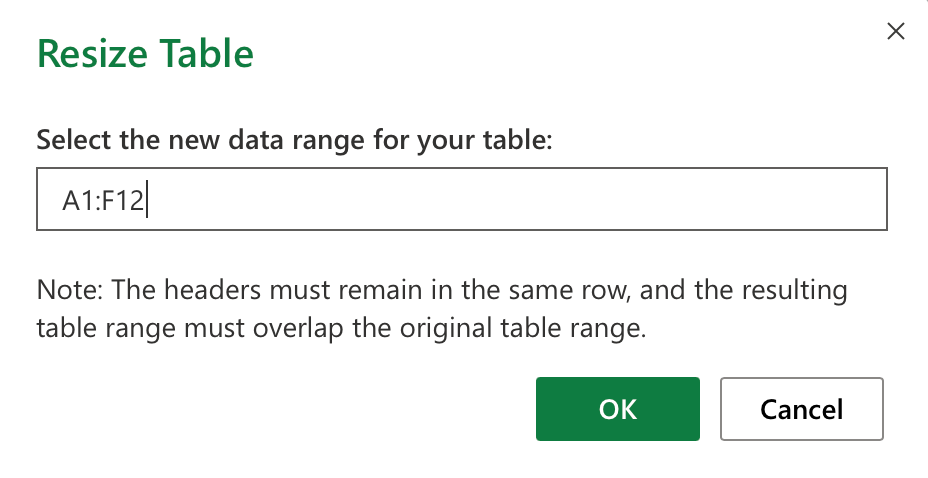
- Click OK
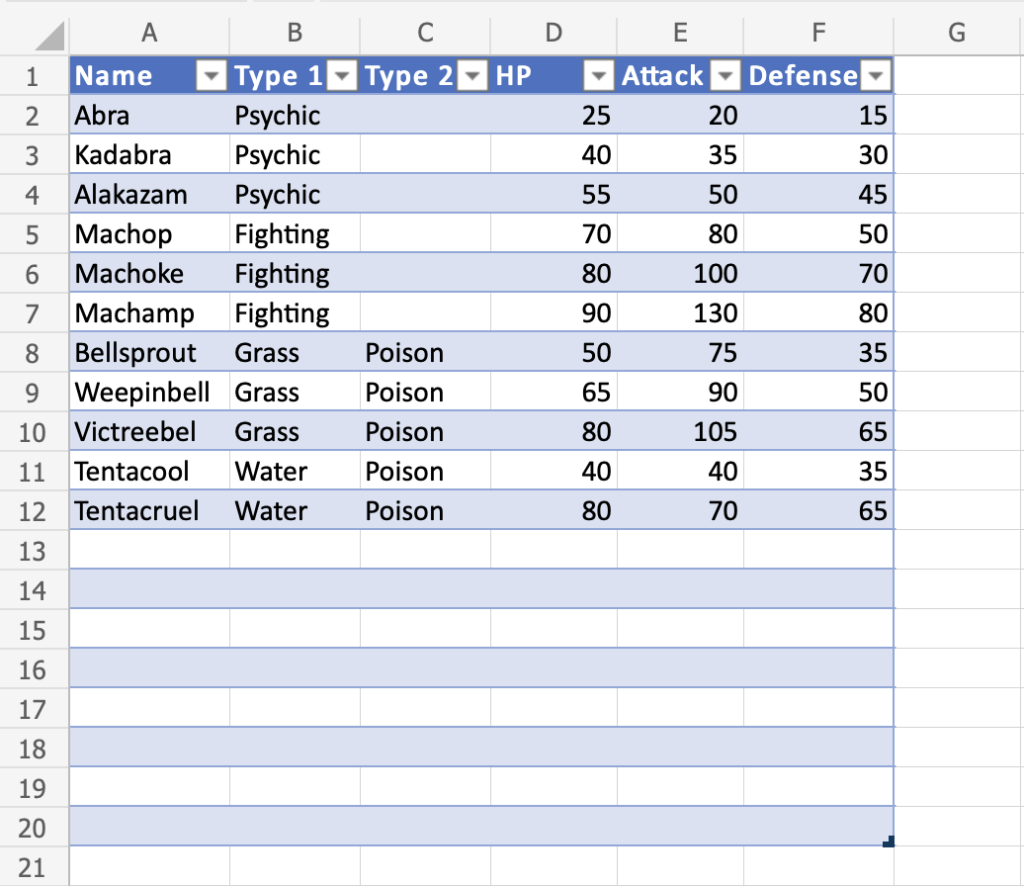
Fantastic! A1:F12 has been replaced with A1:F20 in the table’s dimensions.
Drag to Resize
You can drag the table’s corner to adjust its size.
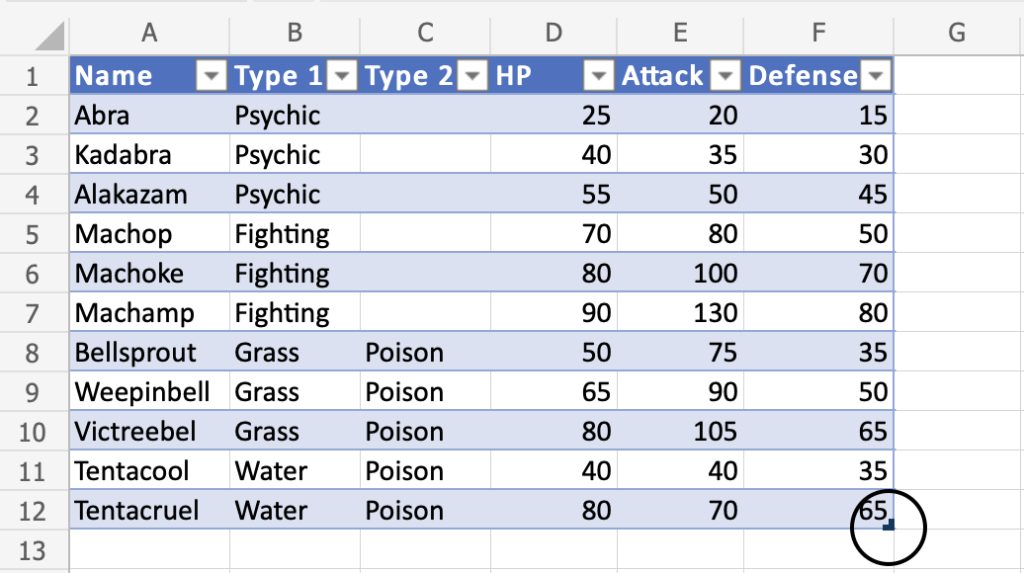
Example - Dragging to Resize, Smaller
Change the tables size from A1:F12 to A1:D5
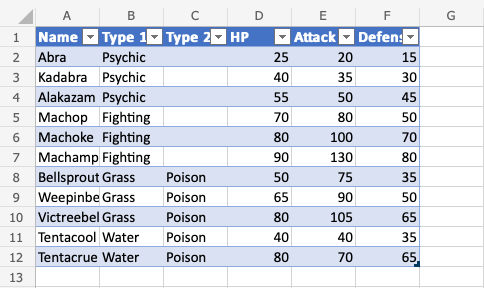
3. Press and hold the bottom right corner of the table (
4. Move the pointer, marking the range A1:D5
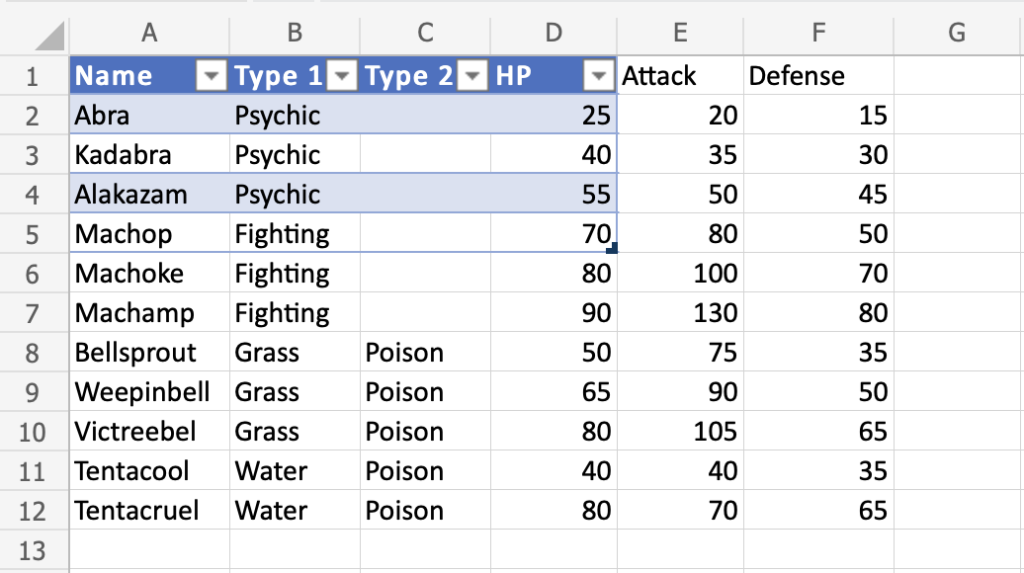
A1:D5 is the new table range, replacing A1:F12.
Note: The table no longer includes cells that are outside of its range. The table has broken the connection between its cells, causing them to lose their table formatting.
To see what occurs, let’s try sorting the Pokemon based on their names.
- Click the filter option in A1
- Sort by Ascending (A-Z)
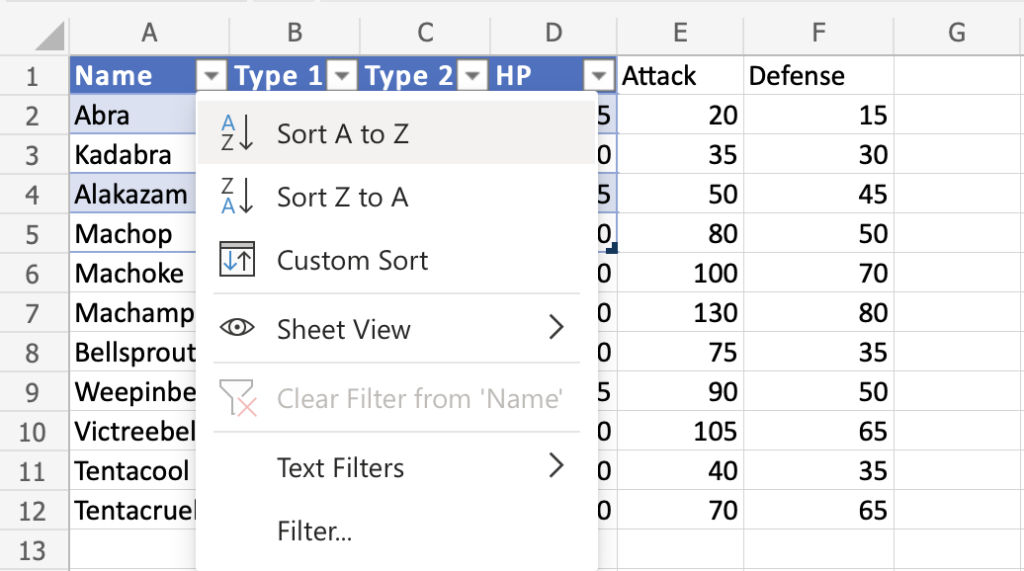
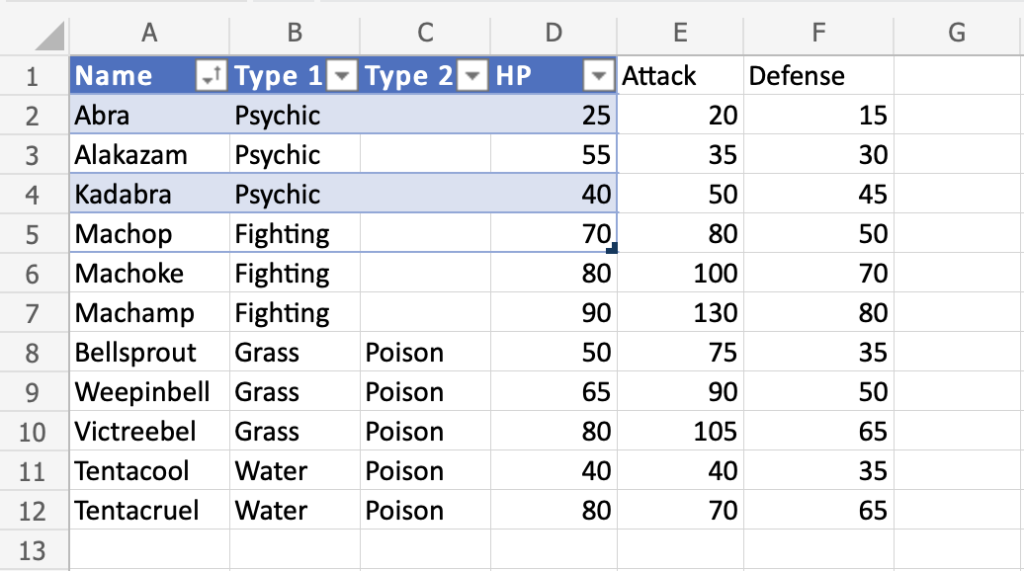
The Pokemon in the tables range (A1:A5) are the only ones included by the filter option. There is a broken connection to the cells outside of the table.
Let’s resize once more, but larger.
Example - Dragging to Resize, Bigger
Change the tables size from A1:D5 to A1:G13
- Press and hold the bottom right corner of the table (
)
- Move the pointer to mark A1:G13
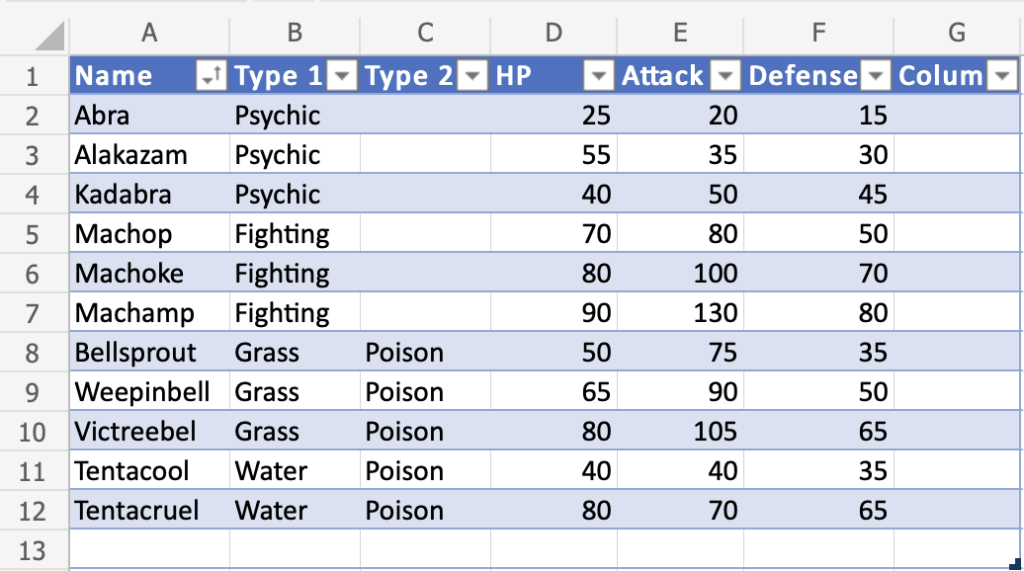
A1:G13 has been used as the new table range instead of A1:D5.
Now that the remaining cells are included once more, the cell-to-cell communication is restored.
To see what occurs, let’s try filtering the Pokemon based on their names.
- Click the filter option in A1
- Sort by Ascending (A-Z)
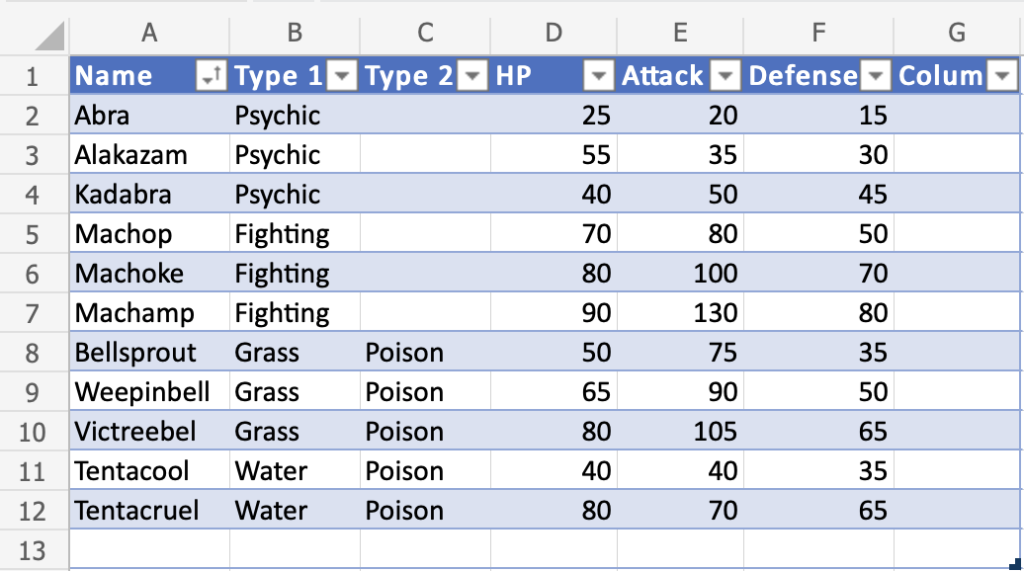
Well done! Pokemon in range A1–A12 have been successfully sorted by name in the table.
Wait, what? There has been a change. There is a new column (G) available.
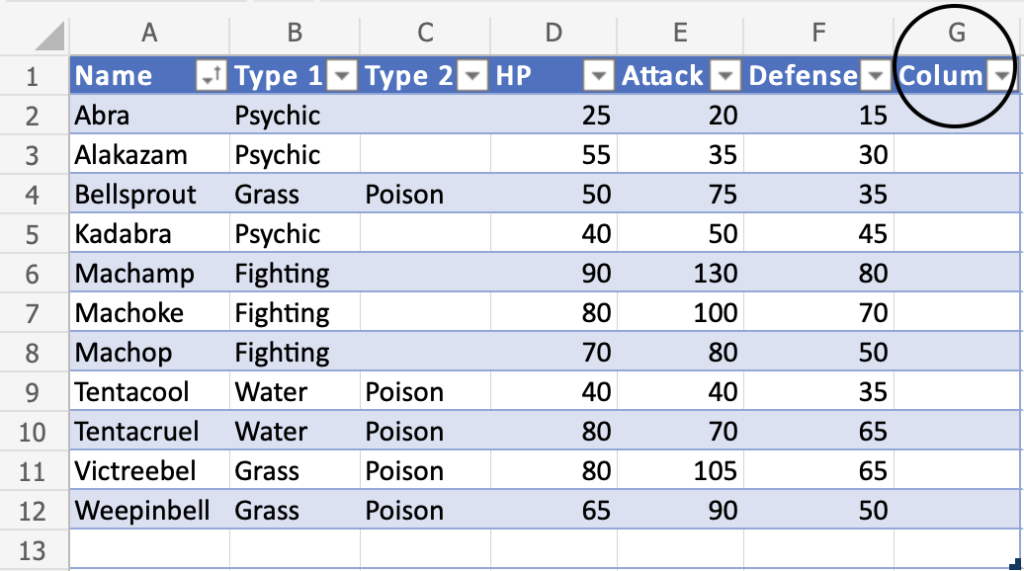
As the table size increases, new columns, formatting, and formulas will be added.
Note: For headers that already exist, the name won’t be overwritten. The value entered in the header cell will be used.
The header name can be changed.
- Double click G1
- Delete the text
- Type “Mighty” to G1
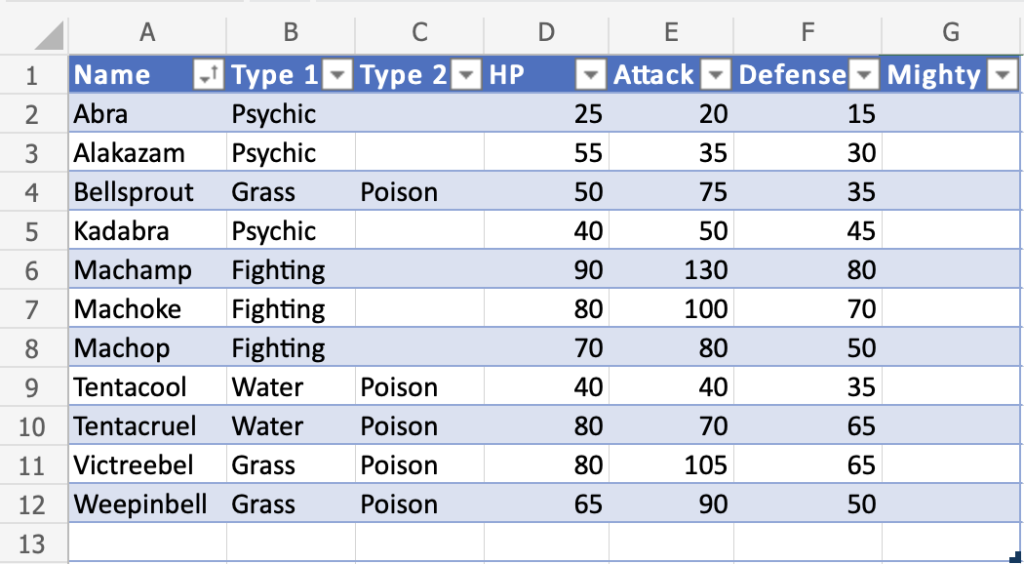
Another Example - Resize By Adding Columns
When additional headings are put adjacent to the table, the table is automatically expanded.
- Type “Mew” to H1
- Hit enter
- Type “Two” to I1
- Hit enter
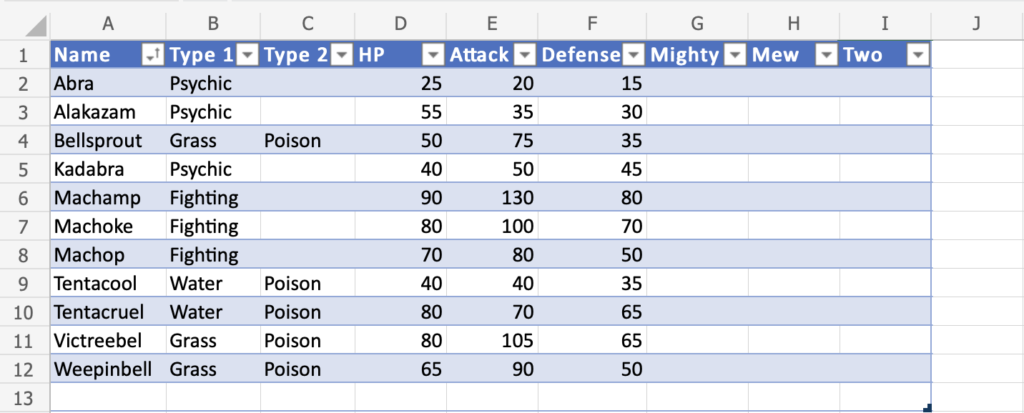
When new headers are typed, new columns are immediately appended with the corresponding rows.
Duplicate removal is covered in the upcoming chapter.
